I don't really have much fear in the kitchen. I'm willing to try just about anything, from wrangling homemade phyllo dough to wielding a scalpel for perfect sourdough cuts. Now that I have kevlar gloves, I am even allowed to use the mandolin again (I said I had little fear, not that I was infallible). There is one thing, however, that has always intimidated me: "refried" beans (aka "refritos").
I certainly haven't shied away from beans in general. I cook with them often. And I grew up surrounded by people who made amazing Mexican food. So, why have refritos (meaning "fried beans", nothing
refried about them) intimidated me?
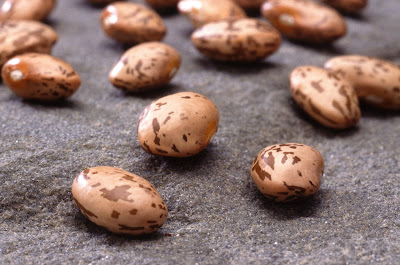 "Pinto Beans" by Brian Prechtel, U.S. Department of Agriculture
The answer is that I had a couple of failed attempts when I was much younger and the canned stuff didn't bother me much, so I stuck with it. I eventually upgraded to organic, vegetarian beans that tasted good. While I still like the canned version just fine, I wanted to get past this fear and just make them, darn it! If nothing else, I can reduce the sodium by making them myself, plus I just wanted to know I could do it. I do not like being a slave to a box or can. This time, instead of picking up another couple of cans for the pantry, I picked up a bag of dried pintos to pretty much force myself to try it again.
Now that I have much more experience under my belt and a bit of food science and training in my pocket, boy were they easier!
First, know that they cannot be rushed. Sure, you can do the quick soak method, but I do not generally like quick soaked beans nearly as much as soaking them a day ahead of time. This particular batch was a 3-day process and I'm not sure I would want to rush them further. I used pintos because it is what I grew up on and most enjoy, but you can use whatever type of beans you like. If you want to use canned beans, however, you should probably just buy them already fried (Bearitos can be found in most larger grocery stores in the US).
Here's what you need (this can easily be halved, but extra can also be frozen):
Dried beans (approx 2 cups)
2 TBL (divided) of some sort of flavorful fat (fat reserved from chorizo or bacon, lard, olive oil, whatever- I like to stick to fats that leave my arteries in tact)
1 onion
2 cloves of garlic
salt
pepper
plenty of cool water (If you have sucky water like we do, I recommend using filtered)
other spices/herbs (optional)
On day 1, I put a cup of beans in a bowl of cool water to soak. I added 3x the water as beans. The end yield will be about 3 1/2 times the initial amount of dried beans.
Day 2, I gave the beans a rinse and added fresh water. In the evening, I gave the beans a really good rinse. This will help rinse away the more gaseous property of the beans. I then placed the drained beans into the pot with a 3-1 amount of fresh water to beans. I added a chopped onion, a minced clove of garlic and pat of Earth Balance for flavor. DO NOT ADD SALT YET. When cooking beans, salt and acids will make it very tough for the beans to soften properly. You don't want to add either of these things until the skins have opened a bit to allow flavor to get to the inside of the beans. I simmered them in the pot for about an hour.
Stir every 15 minutes or so and test for tenderness. If the water gets low enough that some beans are uncovered, add more or they will cook unevenly. Once completely tender, I took them off the heat, transferred the beans and cooking liquid to a container and put back in the fridge.
Day 3, I fried the beans! First, I added a mixture of Earth Balance and olive oil to a large heated skillet. If you have bacon or chorizo fat, it will be even more flavorful. Lard would also work. The point here is flavor. Once sizzling, I added the beans with a small amount of the cooking liquid. Add more liquid until you get the right consistency for you. I like mine on the wetter side. If you want them whole, you can leave them that way. I mashed about half with a potato masher because I like the texture.
Here's the part that was unexpected for me... I seasoned with salt and freshly ground pepper. Period. I was ready to add cumin, paprika, etc, but I loved the way the flavor of the beans themselves shined with just the simple seasoning. If adding to a particular dish, I may add something else, but I think I'll otherwise leave them as-is. If I was looking for spicy beans, I'd probably add red pepper flakes or cayenne with some paprika and cumin to balance it out. They made great, simple tacos with fresh tomato and a sprinkle of crumbled feta.
Woo hoo! One fear smashed (pun every bit intended). Next... swimming with sharks? Okay, maybe I'll just stick to culinary fearlessness.