Showing posts with label vegetarian. Show all posts

Wednesday, September 4, 2013

Stuffed Zucchini and Life Updates

Now that summer is nearing an end, I figure I'd post the perfect summer dish. Yes, I seem to be a step behind on pretty much everything these days.

It's been a crazy summer here at Chez Shea, but a good one, for the most part. We bought a house and closed in July, then took off for a trip to the west coast for a friend's wedding, returning to get settled. I'm in my third trimester of pregnancy, which still feels pretty unbelievable and incredible. I'm very grateful for every little kick! We have just a little over 2 months to go. I'm anxious, but am trying to be patient. I'm hoping our little guy will stay in until he's fully ready. Being a first-time mom, I'm also very nervous.

Back to the food, I love this time of year when huge zucchini are easier to find at the farmer's market (next year: our garden!). I typically stuff them with whatever I have on-hand. Sometimes I will choose leftover meat of some sort (e.g. shredded chicken or crumbled ground turkey), but the emphasis should be on showcasing good, fresh vegetables. If doing as a side dish, I will omit a protein altogether. This time I went all vegetarian with chickpeas. I often bind with some sort of breadcrumbs, but the beans and fresh corn added enough starch in this case, so didn't want to add to it. My last a1c was a 5.4 and I'd like to keep it that way. Keeping blood sugar in check while pregnant is enough of a challenge!

Stuffed Zucchini
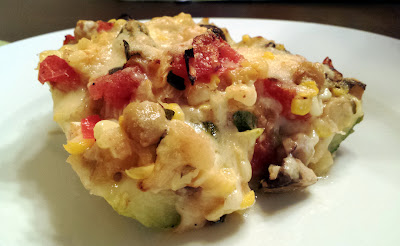
It probably could have used a nice herb garnish for more visual appeal, but I was really into simplicity tonight. And I may also be a little more lazy and anxious to just eat these days.

The constants, other than the zucchini, of course, are tomato, garlic, parmesan cheese, and oregano (fresh or dried). I will often add a second cheese, as well. If your house is too hot in which to bake, this dish also does really well on the grill! See the note below.

This particular batch included:

1 large zucchini, halved length-wise
2 c. garbanzo beans (organic canned)
3 T. fresh basil leaves, chopped
5 T. fresh oregano leaves, chopped
2 ears fresh corn (kernels removed from cob)
6 oz. extra, extra sharp cheddar, cut in a small dice
2 medium tomatoes, diced
2 cloves garlic, minced
salt & pepper to taste
parmesan cheese to cover (approx. 1/4 c.)

Heat oven to 400 F. After halving the squash, scoop out the insides to make canoes, chop the insides and add to a large mixing bowl. Add the remaining ingredients except for the parmesan. Place the filling back in the hollowed out zucchini (in a large baking dish) and top with half of the parmesan cheese. Cover the dish with aluminum foil and place in the oven for approx. 40 minutes. Remove the cover at 40 min. and sprinkle with the remaining cheese. Brown for an added 10-15 minutes. Enjoy!

Note: To grill, wrap stuffed halves loosely in foil (careful, it will get juicy when opening), place on medium heat, close the lid, and walk away for 30-40 minutes. Vent the top and add the parmesan in the end for about 10 minutes until golden.

Tuesday, August 7, 2012

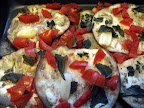
Baked Lemony Eggplant With Tomatoes

I'll be honest-- eggplant and I haven't always been the best of friends. As a kid, it was one of the few vegetables I dreaded, but I think that was more because of the thick layer of undercooked flour soaked in grease that often accompanied it in our house than disliking the actual vegetable. When I got older, I discovered many wonderful foods of the Mediterranean, including some tastier renditions of eggplant, but still didn't ever really seek it out. It wasn't until I was regularly cooking for others outside my family that I braved this seemingly-difficult, purple globe. Once I learned how to get the best out of it, it was so worth it. Keep an eye out at farmer's markets for some wonderful heirloom varieties.


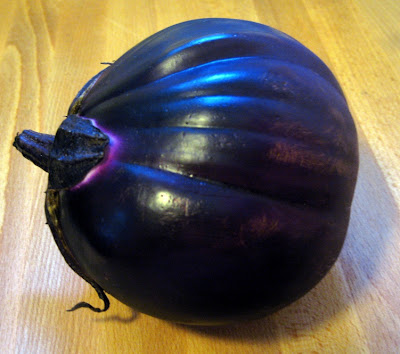
I'm not sure what the variety of this heirloom eggplant is, as it came in our CSA box, but I love that it looks like a deep purple pumpkin. It was definitely more of a treat than a trick.

Of course, I could bread and fry it then smother it with tomato sauce and cheese, but that doesn't exactly fit the bill of a light, healthy dinner. And what kind of challenge is that? I could do the same to a flip flop and it'd probably taste just as good. I'd rather leave the fried stuff behind and explore the beauty of the eggplant itself.

Eggplant and lemon are best buds. They play well with each other. Add some tomatoes and fresh herbs and you won't even miss its fried counterpart. Don't skip the salting & draining process. This pulls moisture out of the eggplant, carrying with it any bitterness. It also helps to avoid mushiness.

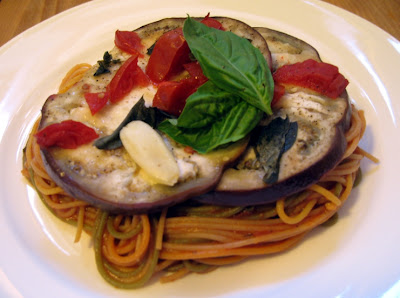
I served this batch over whole wheat & vegetable spaghetti that was dressed in a tomato basil sauce, but it would also work beautifully over well-seasoned quinoa, couscous or the like. I also gave it a sprinkle of parmesan cheese before devouring. The sweetness of the vegetables was a nice contrast to the brightness of the lemon, and the soft, silky texture was really wonderful with the al dente pasta.


Baked, Lemony Eggplant With Fresh Tomatoes (serves 4)
  • 1 large eggplant, cut vertically into 1/4" slices
  • 3 medium tomatoes, chopped
  • juice of 2 lemons
  • extra virgin olive oil (preferably in a mister)
  • 5 cloves garlic (sliced or left whole & lightly crushed)
  • fresh oregano, leaves only
  • fresh basil leaves, torn
  • salt & pepper
1) Lay eggplant slices onto a rack over a pan to catch the juices and salt both sides liberally

2) Allow to drain approx. 45 minutes, flipping once halfway through
3) Preheat oven to 400 F
4) Once drained, gently press each slice onto a clean, dry towel to remove any remaining pooled liquid
5) Spray a large baking dish with olive oil and place the first layer of eggplant down and spray tops with olive oil
6) Sprinkle liberally with lemon juice, chopped tomato, herbs, pepper and a couple garlic cloves

7) Stagger any remaining slices, spray with oil and add the rest of the lemon juice, tomato, herbs, garlic and pepper
8) Bake covered for approx. 20 minutes, or until the eggplant is soft and pliable but not mushy

Wednesday, August 1, 2012

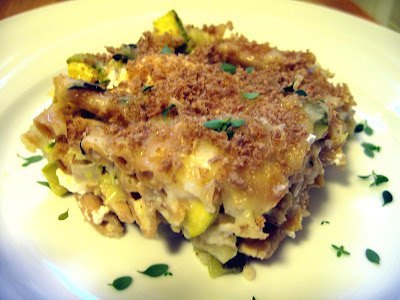
Mac and Cheese Makeover


I love macaroni and cheese. I'm not referring to the boxed stuff with powdered "cheese food", but the wonderful layers of pasta baked in a creamy, dairy wonderland. It can be heavy, rich and filled with overly-refined flour from the roux and pasta. It's tasty, but since I have a tough time eating a single bite and walking away, I've made a few adaptations over the years that point it in a healthier direction.

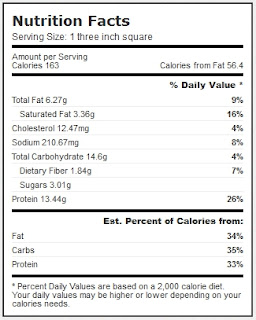
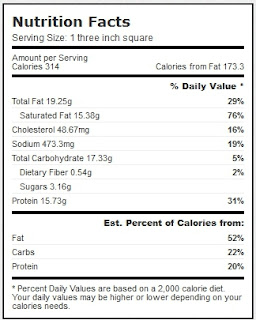
In addition to whole grain pasta and lighter cheeses, I also add plenty of vegetables to further lighten the dish. It's still not exactly what I'd necessarily consider a health food, but definitely a lighter version of the original. The fat that remains in the dish helps with satiety, but also contains far less saturated fat and cholesterol. I've included the nutrition information below, as compared to the same serving size of more traditional baked mac & cheese. Keep in mind that this is for a 3" square side dish serving. If you raise it to a main dish portion, the differences in fat and calories of the more traditional method are especially scary to me.


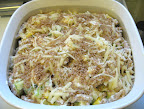
Mac & cheese made over (left) vs. a more traditional mac & cheese (right)

Rather than adding the goat cheese to the cheese sauce, dotting with the cheese in layers gives you wonderful bursts of flavor throughout the dish. For the vegetables I used a mixture of zucchini and yellow squash, but you could use the same amount of other vegetables, such as broccoli or turnip. Layering in some spinach would add even more nutritional boost.

Goat Cheese and Summer Squash Macaroni and Cheese (yields 9 side dish or 4 main course servings)
  • 8 oz. (dry) whole grain penne or elbow macaroni
  • 1 1/2 c. nonfat or low fat Greek yogurt
  • 6 oz. reduced fat cheddar, grated and divided (I use a sharp white cheddar made from 1% milk)
  • approx. 3 Tbl. liquid (milk of choice, vegetable stock or whey from making goat cheese-- the whey is especially flavorful)
  • 2 tsp. olive oil
  • 1 onion, diced
  • 1 clove garlic, crushed or finely minced
  • 2 c. summer squash, chopped (approx. 1 large or 3 medium)
  • 1 tsp. dry mustard
  • 1 pinch cayenne (optional)
  • salt & pepper to taste
  • 2 sprigs thyme, leaves removed from stem (optional)
  • 4 oz. goat cheese
  • 1/3 c. whole wheat panko bread crumbs
1) Cook pasta according to package directions, reducing the time by approx. 3 minutes
2) In a large, hot skillet, add olive oil & sautee onions until just glossy, then add garlic and squash. Cook until the squash is just softened and set aside
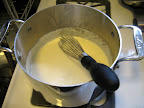
3) In a medium saucepan, heat yogurt over a *low flame & add 3/4 of the cheddar, whisking until the cheese is melted and incorporated. Add mustard. Use liquid to thin until you have a smooth cheese sauce that still coats the back of a spoon (and the pasta).

4) Stir pasta and zucchini into sauce to coat and season with thyme, cayenne, salt & pepper
5) Pour half of the pasta mixture into a greased 9x9 baking pan & dot first layer with half of the goat cheese
6) Add the rest of the pasta and dot with remaining goat cheese
7) Sprinkle the rest of the cheddar on top
8) Top with panko

9) Bake in a 375 F oven for approx. 20 minutes or until cheese on top is melted and panko is well toasted

Let rest for 15-20 minutes before serving.

* A low flame is especially important if you're using nonfat yogurt, as it easily breaks over high heat.

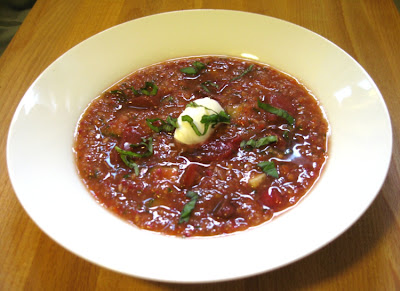
Chilled Tomato Celebration Soup

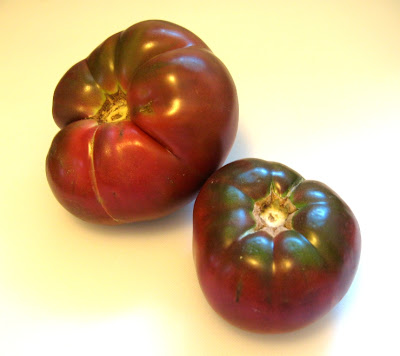
The heirloom tomatoes from our CSA have been rocking my world. Many people pass on by the "ugly" organic heirloom tomatoes in the sumarket, if the store even sells them. They're easy finds at most farmer's markets, though. They come in a wide array of colors, sizes and textures, but are often somewhat imperfect in appearance. Trust me-- these are often the best ones, taste-wise. Just pick one up and feel its heft, which is a hint to its juiciness. All these Cinderella fruits need is the right nudge from us, their fairy godmothers (of course, sparkly shoes never hurt, but that's another story). If you find a type you like, hang on to a few of the seeds and ferment them to grow your own next season!


Brandywine heirloom tomatoes-- this variety is particularly tasty.

I wanted to do something to celebrate their deliciousness, without cooking and losing that freshness. I decided on chilled soup. I love gazpacho, but modified that to really focus on the tomato, leaving out the spicier notes. I also gave the bread a miss, so added a few other vegetables and olive oil to cut the acidity. I blended half the tomatoes and left the rest in noticeable, sweet chunks.


Chilled Tomato Celebration Soup (serves 4)
  • 4 medium tomatoes, diced
  • 1 small cucumber,diced
  • 1 small turnip (I used 1 pink turnip)
  • 1/2 carrot
  • 1/2 spring onion (or 4 scallions, whites only), chopped
  • basil (approx 8 leaves)
  • juice of 1/2 lemon
  • 1 Tbl. olive oil (optional)
  • salt
  • pepper
  • Additional basil & Greek yogurt or olive oil, for garnish
Place half of the chopped tomatoes to a large colander and sprinkle with a pinch of salt, stirring to evenly distribute the salt. Let drain over a large bowl for approx. 30 minutes to catch the juices. This step is optional, but yields slightly more firm pieces and helps prevent mushiness. Periodically, give the colander a gentle shake to make sure the juices are draining properly.

Pour the juice into a blender and add the other half the tomatoes, turnip, onion, basil, lemon juice and olive oil (if using). Blend until smooth and pour into a large bowl. Add remaining tomato and season with salt & pepper. Garnish with basil & yogurt or olive oil.

Thursday, July 26, 2012

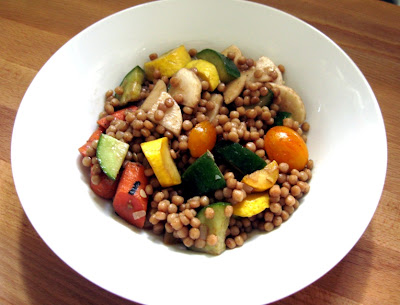
Summer Vegetable and Pearl (Israeli) Couscous Salad


I used whole wheat pearl (aka "Israeli") couscous. If you're unable to find it, whole wheat orzo is a nice substitute. They're both great for summer salads. One of the things I love about this dish is that there's a high vegetable to pasta ratio, so you can feel like you're having an indulgent portion of pasta salad, but it still has very little impact. This yields 6 large servings weighing in at approx. 100 calories each and plenty of fiber. I also love the contrast of the crunchy, fresh vegetables, the softness of the grilled squash and the nutty flavor of the toasted pasta.

A small annoyance for me is uncooked carrot pieces in salads. If they're larger than a sliver, I have to chase them around with my fork, trying to get them to cooperate and climb on board. On the other hand, I like carrots and even like the texture they bring. In this case, I grilled them. It was perfect. The outside softens just enough so that they are easily pierced with a fork, but the core stays firm. It also brought out a small amount of the carrots' natural sweetness.

The beauty of this simple, quick summer salad is that you can use whatever vegetables you like. With exception of the carrots, everything was straight from the farm and our garden. I grilled the squash and carrots, but left the remaining vegetables raw for a wonderful mix of textures and flavors.
Summer Vegetable & Pearl Couscous Salad
  • 1 c. Whole wheat pearl (Israeli) couscous (or orzo)
  • 1 small onion (or 1/2 large onion), diced
  • 1 Tbl. olive oil, plus more to coat grilled the vegetables
  • 1 1/4 c. vegetable stock
  • 2 medium summer squash, halved lengthwise
  • 2 medium carrots, peeled 
  • 4 oz. cherry tomatoes, halved (or one medium/large tomato, chopped)
  • 1 medium cucumber (unwaxed, if possible, so there's no need to peel)
  • 2 small, white salad turnips
  • 1/4 c. *vinaigrette (I usually use a lemon vinaigrette, but went with balsamic this time)
  • fresh herbs, if desired
Heat a grill (indoor or outdoor) on medium-high. While the grill is heating, cut the summer squash lengthwise. If it's particularly large in diameter, slice lengthwise again. Peel the carrots. Mist the carrots and squash with olive oil and season lightly with salt. If you don't have a mister, you can use a pastry brush to lightly apply the oil. Grill on each side until the squash is tender and the carrots are just slightly softened. The grilled veggies also lend a mild smokiness. Turn halfway to grill both sides (for the carrots, you can rotate to get all 4 sides, but it's not necessary). Once they're each done, slice them for the salad.

In a medium saucepan, heat a Tbl. of oil on high. Once you start to see small wisps of smoke, add the couscous to the pan to toast. Stir to coat evenly with oil and stir frequently until the couscous appears lightly toasted. Add the onion and vegetable stock and give a stir. Bring to a boil, then cover and reduce to a simmer until most of the liquid is absorbed (start checking at approx. 10-15 minutes).

Once the couscous is done, pour it into a mixing bowl and add the chopped carrot, squash and tomato. The warm pasta will relax the tomato to bring out maximum flavor. Add about half of the dressing, so that the couscous absorbs the flavor and doesn't get sticky as it cools. Once at room temperature, add the cucumber and turnips, along with any fresh herbs and the rest of the dressing (careful not to overdress). Season with salt and pepper to taste, if necessary.

Serve room temperature or cold. I served this batch under sauteed tilapia with a quick lemon, thyme and caper pan sauce (which is why I didn't go with lemon dressing). The lemon worked well with the balsamic, but offered enough contrast so that it wasn't a one-note dish.

*Vinaigrette

I usually do a 2:1 ratio of fat (oil) to acid (some prefer 3:1), but since I had already used oil when toasting the couscous and on the grilled veggies, I went closer to a 1:1 ratio and seasoned with just salt and pepper. I used a fruity olive oil & aged balsamic vinegar, but you could use any combo of flavorful oil to acid (vinegar or citrus juice), whisk until emulsified and season to taste. As for herbs, when using a lemon vinaigrette, I often use thyme or tarragon and parsley in the salad. I love fresh oregano with the balsamic. Basil would be a nice addition, as well. I also love doing fresh mint with lime. Get as creative as you like!

Tuesday, July 17, 2012

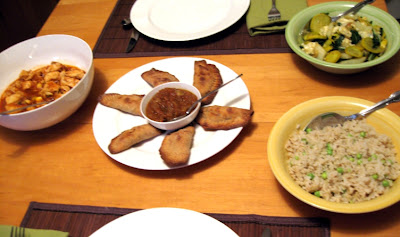
An Indian-Inspired Feast

After seeing "The Best Exotic Marigold Hotel" (excellent film), I knew Indian food was in our near future. I could practically smell everything they were eating through the screen. While the theater was just a few blocks from one of our favorite Indian restaurants, I knew we could eat more healthily at home and still be satisfied. I missed having roti (whole wheat flat bread, similar to naan) as part of the meal, but that was a little more starch than I should be eating in one sitting with samosas and rice, so I left it out this time.
On the menu:


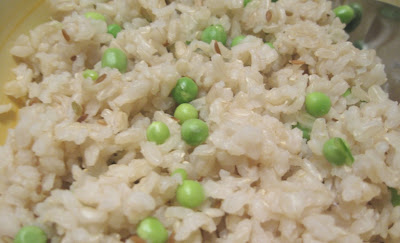
The rice was easy and straight forward. I was out of brown basmati rice, so went with regular brown long grain (sprouted, if you have it). I mixed in some cumin seeds in with the rice (approx. 2 tsp. per cup of dry rice) and steamed in my rice cooker. Once done, I mixed with some freshly-shelled peas (you can save the pods for another dish). If using frozen peas, you could add them before cooking. I would just skip the peas in that case, but you may feel differently. The cumin seeds add a wonderful fragrance.


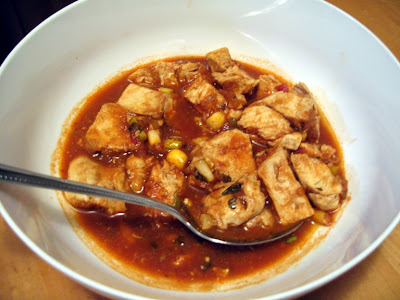
The chicken tikka masala was the only real "cheater" dish. I would have made my own sauce, but I've had a jar of Trader Joe's Masala Simmering Sauce in our pantry for a while and was curious to try it. I was doing enough that I figured jarred sauce was justified. It tasted pretty good. For nights when I want to throw something together quickly, I may use it again (though the nearest Trader Joe's is hours away). I like that they don't add a bunch of unnecessary, unpronounceable ingredients. The only thing I added aside from chicken, the sauce & water (the sauce is concentrated) is some sliced scallions (white and light green only). The sauce is very easy to make, though. Google for recipes, if desired (I kind of wing it and haven't paid much attention to proportions of ingredients... next time I'll make a note of it as I'm doing it).

Here's a little trick: If the sauce is too thin, a little pumpkin or other winter squash puree is a great way to thicken without adding oodles of cream or fat. I usually keep a can of pumpkin puree (not pie filling) on-hand, just for those situations. And you then have an excuse to make muffins out of the remaining puree (mmm...).

One of my only complaints about this dish in restaurants is that the chicken is often dry. It seems an insult to the lovely, velvety, sweet/savory sauce it usually accompanies. Prolonged cooking can kill white meat chicken. Fast cooking can also do the same, if you're not careful. The muscle tenses with harsh heat and, in that process, can squeeze the moisture right out.
One tip for getting the most moist chicken breast you've encountered... poach it! This is especially gentle if using boneless, skinless breasts. I pulled the skin off, then de-boned the breast and used the bones for added flavor in the poaching liquid. Fill a pot with cool water, add aromatics & spices (I used an onion, a few sprigs of thyme and tarragon, along with a cinnamon stick, cardamom pods, salt, pepper) and bring the water until just below a simmer (approx. 170 F, poaching is between 160 F & 180 F). Once the water is up to temp, add the chicken breast (whole). Check with an instant read thermometer after 15 minutes. Remove from heat when the internal temp reaches 160 F. It will come up to 165 F while resting. Let rest for at least 10 minutes before cutting. Cube and add to the preheated sauce just to warm everything through.


The gulab jamun (one of my most favorite desserts on the planet) was good, but not great. The flavor was spot on, but the texture and leavening was slightly off. This was my first time making it, so I'd like to make a few more tweaks before posting the recipe.

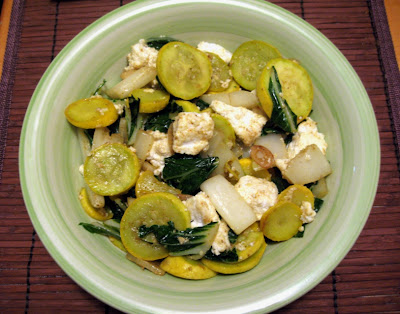
Summer Squash and Bok Choy Paneer


I love palak/saag paneer. I've gotten various answers from a few Indian friends as to the difference between saag and palak. Both tend to mean spinach in the restaurants I've frequented, but one friend said that one was actually mustard greens (I forget which). Another said that one is creamy (think creamed spinach) and the other isn't, but restaurants don't seem to keep consistent to that distinction, either. I prefer non-creamy, whatever the vegetable.

This version doesn't contain either spinach or mustard greens, but it's somewhat of a tribute. Much like the samosas I made for the same meal, this is also an excellent opportunity to use whatever vegetables you may have that sound good, ending with a wonderfully tasty vegetable dish. Case in point-- I was planning on just using kale, but when I went to dig it out of the veggie drawer, I found it had gone south on me. In a 3-second re-think, I grabbed the bok choy and summer squash instead. Oh, and it's an excuse to make cheese. That's hardly a negative in this house. I loved the silkier mouth feel of the freshly-pressed paneer, for a perfect mixture of textures. Don't panic when the cheese doesn't melt. It's not supposed to.

I have no idea how to say "bok choy" or "summer squash" in Hindi, but however it's translated, it's also yummy and light. The fresh cheese brings an indulgent feeling to the table, without actually being overly decadent.

Ingredients:
  • 1 Tbl. olive oil
  • 2 summer squash, sliced into 1/4" slices
  • 3 leaves/stalks of mature bok choy (or one head of baby bok choy), roughly chopped, white stalk and greens separated.
  • 2 cloves garlic, sliced thinly
  • salt, to taste
  • cayenne, to taste (optional)
  • *garam masala 
  • **paneer from 1 half gallon milk, cubed (If buying this, approx 6-8 oz.)
1. Heat the oil in a hot skillet
2. Toast oil for just a few seconds (3-5), until just starting to turn golden (careful, if it burns, you'll be starting over) and remove from the pan.
3. Add squash, the whites of the bok choy & a pinch of salt and sautee until you start to see their moisture escaping into the pan, stirring frequently
4. Add bok choy greens & paneer and stir every few seconds to ensure everything cooks evenly and the greens are just soft, but not overcooked
5. Adjust seasonings, as needed

* Garam Masala: (Which essentially just means a blend of dry spices. There is no, single garam masala mixture. This is approx. what I used, but you could substitute/adjust as you see fit or add a curry powder you particularly like)

  • 5 cloves, milled in a spice grinder or crushed w/ a mortar and pestle
  • 1/2 tsp cumin seeds, milled or crushed
  • 1/2 tsp coriander seeds, milled or crushed
  • 1 bay leaf (removed before filling)
  • 1/2 tsp. freshly ground black pepper
  • 1/4 tsp. cinnamon
Note: Where using whole spices, lightly toast in a hot skillet before grinding, to release their oils.

**Paneer:

The method for paneer is very similar to making goat cheese, going one step further. Once the cheese is made, it's pressed, like you would press tofu.
  • 1/2 gallon milk (I used 1%, but you could use anything from full fat to nonfat)
  • 1 tsp. citric acid powder (you could use approx. 1/4c lemon or lime juice, adding more if necessary to break the curds from whey)
  • 3 quart sauce pan/pot (nonreactive)
  • Candy thermometer or probe thermometer with clip
  • a clean tea towel or butter muslin
  • strainer
  • something to use as a weight to press cheese (I used a small canister, similar in size to the strainer)
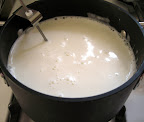
1. Pour milk into the pot and slowly bring up to 190 F, stirring occasionally to ensure the milk isn't scalding on the bottom of the pot.

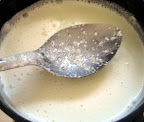
2. Add citric acid (or lemon/lime) and wait a few seconds to curdle. This will be fine curds (like goat cheese). If you don't see curds after a minute, add a small amount more of acid (1/8 tsp. powder or 1 tsp. juice).

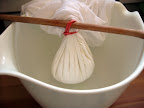
3. Strain in strainer or colander lined with tea towel or butter muslin, gather the muslin and tie to a wooden spoon to drain for approx. 30 minutes.

4. Cover with the other half of the towel and place a weight on top and press for 30-60 minutes.
5. Remove the weight, place in a covered container and refrigerate until use.

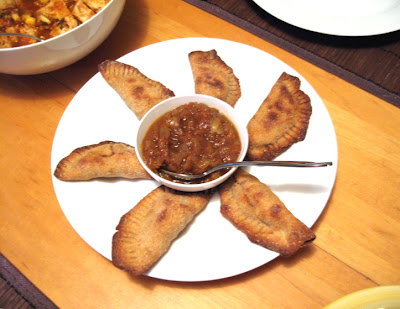
Baked Root Vegetable Samosas With Grapefruit Chutney

Rather than frying the samosas, I bake them. This dough still yields a nice balance of crispy and chewey crust.

The filling falls in the category of "I have a bunch of veggies to use and these sound good". I sometimes do the more traditional potato & peas filling, adding carrot for a bit of sweetness. Since I don't really care for either potatoes or peas (unless they're straight from the pod, and those went in the rice), however, I often seek out different fillings. Since we had turnips that needed to be used, I figured they were a great substitute for potato. I left in my usual standby of carrot. One of the beauties of these little pastries is that the filling can be pretty much whatever you want. You could even do a dessert version with fruit!

You should serve with some sort of complementing sauce(s). This time I served them with some grapefruit chutney (recipe below), but there are endless sauces you can use. One of my favorites is seasoning pumpkin butter with warm spices (cardomom, cumin, etc) and apple cider vinegar.

The rolling and assembly of the samosas was courtesy of my husband and favorite sous chef :-)

Samosas - Yields approx. 1 dozen samosas.

Pastry: (adapted from Mollie Katzen's "Moosewood")
  • 2 c whole wheat pastry flour, plus more for kneeding
  • 1 c plain yogurt (If greek, add 1 Tbl. of water)
  • 1 large pinch of salt
Mix all ingredients in a bowl. Knead for a few minutes (between 3-5 min.). You don't want to over work the dough, but you do want to develop enough gluten so that it's strong enough to hold the filling. Once this is done, cover with a damp towel and set aside to rest while you make the filling (if longer than an hour, put it in a baggie and into the fridge- this can be done even a few days ahead).


Filling: (I vary the filling frequently. You need approx. 3 c of chopped raw vegetables-- more if they lose a lot of moisture while cooking)
  • 3 small pink turnips (one large turnip would do), skin-on, scrubbed and diced
  • 2 carrots, peeled and diced
  • 1 Tbl. olive oil
  • 1 tsp. mustard seeds
  • 1 tsp. cumin seeds, crushed
  • salt, to taste
Keep in mind that you want to have your vegetables all cooked to your desired doneness at the same time. It's okay to start cooking the hardier vegetables for a few minutes and then add those that will be done more quickly. I actually like that in this particular combination the carrots take longer than the turnips. I started them at the same time on purpose, so that the turnips with be nice and soft while the carrots were tender, but still had some body to them. The combination of textures were great!

Heat the oil in a hot skillet and add the vegetables, in stages, if necessary. Add a pinch of salt, the mustard seeds. As the vegetables soften, season to taste.

Filling, before & after

Let the filling cool before assembling.

Assembly: (at this point, preheat your oven to 425 F)

  • Divide dough into approx. 1" balls
  • Flour your workspace and roll into approx. 5" circles
  • Place approx. 1 1/2 Tbl. of filling (better to slightly under-fill than over-fill)
  • Fold in half around the filling and crimp edges with a fork, along the semicircle
Baking:
  • Place on an oiled baking sheet (I used an olive oil mister)
  • If you have a mister with olive oil, spray the tops of the pastries, as well
  • Bake for 15 minutes
  • Turn over and reduce oven to 375 F
  • Bake another 7-10 minutes, until brown
Grapefruit chutney
  • 1 large ruby red grapefruit
  • 1/2 onion (I used a small, whole spring onion)
  • 2 Tbl. apple cider vinegar
  • 1 Tbl. brown sugar, or equivalent (I used a brown xylitol/stevia blend)
  • 1 tsp. cardomom
  • 1/2 tsp. cumin
  •  a few grinds of black pepper
  • 1 pinch cayenne (optional)
  • salt, to taste
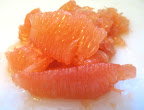
Using a sharp knife, peel the grapefruit, taking care to remove and discard all of the bitter white pith. Section the grapefruit out of its membrane and cut into chunks (they will break down as they cook), removing any seeds. If you are a whole-foods eater like me, finely mince the membrane and add with the fruit. It does add a small amount of bitterness, but the rest of the flavors mellow that component. If you have a cutting board with a little reservoir, use it to capture any juices and pour them into the pot, as well.


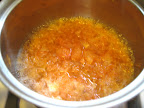
Saute onion in a small amount of water to soften, then add grapefruit (or, if you're like me, do the onions separately because you initially forgot them until the first taste, haha). As it's about half way softened, add vinegar and approx. 1/2 c. water. Let simmer slowly until reduced approximately by half (approx 30 minutes), stirring every 5-10 minutes. Add seasonings slowly and adjust where necessary. It should be like a loose jam. Let it cool to room temp before using.

Wednesday, July 4, 2012

I Fought the Slaw and the Slaw Won

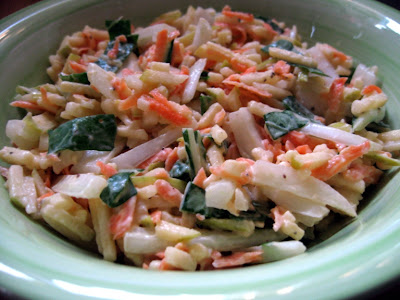
Okay, we both won. It got to taste good and we got to eat it. Today's slaw went perfectly with our Independence Day meal and would be welcome in this house as a part of any sort of summer barbecue fare. Bok choy gives it a wonderful, fresh crunch and apple lends a touch of sweetness.


Bok Choy and Apple Slaw (yields approx. 8 servings of 2/3 cups each)
  • 1 head of bok choy, whites cut lengthwise the width of matchsticks then into 1" strips, greens chopped (I only used 1/2 of the greens)
  • 2 large green apples (unpeeled) and cut into matchsticks (a mandolin makes this very easy)
  • 2 carrots, peeled and grated
  • 1/3 c nonfat plain Greek yogurt (or regular plain yogurt, strained)
  • 2 Tbl. mayonnaise (your favorite will do- I prefer light olive oil or homemade)
  • 2 tsp. celery seed
  • salt & pepper to taste
  • 1 tsp. prepared horseradish (optional)
As soon as you cut the apple, mix with a spoonful of the yogurt. The acid in the yogurt will help keep it from turning brown. Mix everything together and enjoy!

Tip: This can easily be made the night before. The bok choy stays crunchy, the yogurt keeps the apple from browning and the flavors have more time to marry. Leftovers are equally as good the next day.

Thursday, June 28, 2012

CSA #4 & Roasted Sunchokes

Before I go into this week's CSA offerings, I need to add a recent sunchoke (AKA Jerusalem artichoke) discovery. They are delicious roasted! I have no idea why I haven't ever tried this before.

I think I've discovered one of the secrets to skin-on sunchokes-- a vegetable brush. Most people's comments I've read on the subject say that the skins are too tough when roasted. I didn't think so at all. They weren't any more intrusive than a skin-on red bliss (or other waxy) potato. What I have noticed, though, is that you have to scrub the heck out of them to get the dirt off. If they end up several shades lighter than when you started and your brush is filled with dirt, you're in business. If you start to see white, you've gone too far.

Until recently, I'd only ever eaten/prepared them raw or in purees. The weekly pile of them has made me think inside the (CSA) box. So, when roasting some chicken legs/thighs, I halved several small sunchokes, cut a few carrots to the same size, added a couple of huge cloves of garlic and tossed them in just enough olive oil to lightly coat and seasoned with salt, pepper and fresh thyme. They were in a 350F oven for about 30 minutes or so then about 20 more minutes at 450F (while the chicken was resting), after which they came out wonderfully browned, but still retaining a bit of bite to their texture. Roasting on their own, I'd go straight to 425F for about 40 minutes or so. Vegetable heaven! We scarfed them up before I even thought about taking a picture. I'm sure this won't be the last time I make this, though. I'm also betting they'd be great in a foil packet on the grill, which is much more summer weather-friendly.

This week's haul-- mostly repeats:

  • Lettuce
  • Kohlrabi
  • Kale
  • Hakuri turnips
  • Parsley
  • Scalions
  • Arugula
  • Cilantro

Tuesday, June 26, 2012

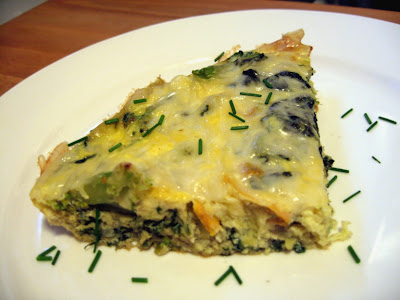
Vegetable Frittata & First Harvest

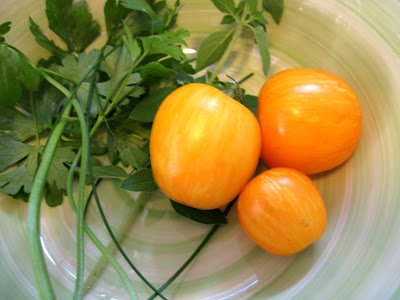
We harvested our first tomatoes of the season. We've already gotten more this year than last (we had a terrible crop last year- totally our fault) and there are a ton left on the vine in various stages of ripeness. These are rambling yellow stripe. They have a mild tartness to them, which I really like. We also have romas and a couple of early girls. I'll probably add an indeterminate variety when the yellow stripes are finished producing. I love a sudden bumper crop, but I want something that will go late into the season.


I think I've been fighting something off the past few days. I've been absolutely exhausted, so not cooking much that required any sort of work. As a result, we had several vegetables that needed to be eaten. My husband had the brilliant idea of a frittata. Perfect!

Frittata is the quintessential use-stuff-up dish. All you need are about 3 eggs per person, whatever fillings you want, and an oven-safe frying pan. You can use anything for fillings, from veggies to meats or even pasta. If the vegetables are raw, it's best to soften them a bit before adding so that they don't take too long in the oven, resulting in overcooked eggs. Start the eggs in the pan (I usually sautƩ aromatics then add the beaten eggs), add the veggies, par-cook the eggs, then top with cheese (if using) and finish in a 375F oven for about 10-15 minutes (or longer, depending on size of pan and amount of fillings). You could also broil the cheese to finish, if it's not browned enough for your taste.

Tonight's frittata for two was 4 whole eggs, 1/2c of egg whites, low fat cheddar and plenty of veggies. I used green onion, kohlrabi, kakuri (a Japanese salad turnip), broccoli, spinach and tomato. I quickly blanched the turnip, broccoli and kohlrabi. At the same time, I sautƩed the spinach in a small amount of olive oil with the green onion and a minced clove of garlic. Along with basic seasoning, I also grabbed some chives, parsley and oregano from the garden. Despite the veggies being chosen more for expiration than complement, I loved this particular mix of textures and flavors. The turnips and kohlrabi added body, while the rest of the vegetables and herbs kept it light, yet satisfying.


Monday, June 18, 2012

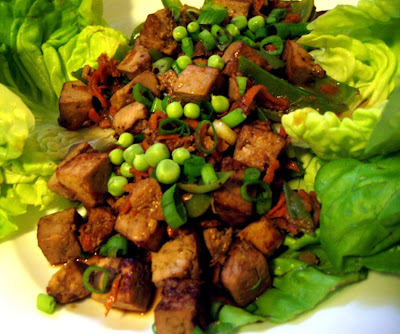
Lettuce Wraps

As much as I love sushi, I often feel the lack of vegetables if eating just a couple of rolls. Yeah, we could have a couple of veggie rolls, but I wanted more. I also had a hunch that a straight forward salad wasn't going to work for me, either. So, as a supplement to our sushi, I mixed cuisines and decided to make some lettuce wraps-- specifically, tofu lettuce wraps.


Now, I know what you might be thinking... tofu? Yes, tofu. In its raw, naked state, it can be less than appealing. It's pretty much flavorless and the texture can be anywhere from wet paper to jello. Prepared well, though, it can do just about anything! I should clarify that we're not talking about silken tofu here, which is an entirely different ballgame (also good, but handled differently- we can discuss that another time).

The real secret to working with tofu is pressing it. This removes some of its moisture to take away the jiggly-ness, improving its texture, and making way for some actual flavor. Since it doesn't have much taste on its own, it can can be seasoned in pretty much any manner you want.

These lettuce wraps are the perfect thing for rounding out an otherwise light meal. The spicy, warm filling wrapped in the cool, refreshing lettuce cups are a sweet summer combo.

Tofu Lettuce Wraps
  • 1 block extra firm tofu, pressed and cubed (I actually pressed it 4 times to get the right texture- twice whole, once in cutlets, once in strips)
Marinade:
  • 1/2 c low-sodium soy sauce (gluten-free, if applicable)
  • 1/4c neutral flavored or peanut oil (1 Tbl. reserved for sautĆ©ing)
  • 1/4c rice wine vinegar
  • 2 cloves garlic, minced
  • 1 tsp. grated ginger
  • 1 Tbl. honey (or sweetener of choice, adjusted to taste)  
Sauce and serving:
  • 1 Tbl. hoisin sauce (see note)
  • Sriracha, to taste (optional- you could easily substitute with red pepper flakes or leave it out entirely if you can't do spicy foods or your hoisin is spicy enough)
  • green onion (whites and greens, sliced, divided)
  • 1 medium carrot, grated
  • 1 tsp. sesame oil (optional)
  • other vegetables you may want to use up
  • 8 small-ish lettuce cups or 4 large, split in half
Note: If you don't have hoisin sauce, it's easy to make, including without gluten (a Google search will yield plenty of recipes). Alternately, add approx 1 tsp natural, unsweetened peanut butter to final sauce and adjust seasonings as you like.

Combine the first 7 ingredients, whisk to emulsify. Adjust seasonings to taste. Marinate cubed tofu for 1 hour (or as long as you can within that hour). If longer than an hour, make sure it's refrigerated, for food safety.

Once the tofu is marinated, drain the marinade into a bowl and give the tofu a slight blot with a paper towel so that it will properly sautƩ instead of steam. The beauty of only using tofu and vegetable ingredients is that the drained marinade can be used to start the final sauce. Add the hoisin sauce (or peanut butter) and whisk to combine.

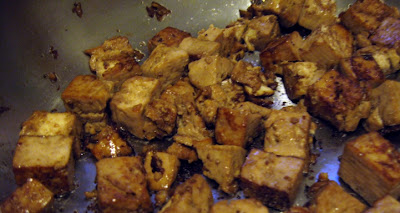
In a medium-hot, large skillet (not nonstick), add approx. 1 Tbl. vegetable oil (peanut, soybean, canola, grapeseed, etc) and distribute evenly. It takes a surprisingly small amount of oil to get a nice crust on the tofu, which means building more flavor. Just as you see wisps of smoke, add the tofu to the pan in as even a layer as possible. As the tofu sears and is ready to turn, it should release from the pan somewhat easily. Give a turn every few minutes to ensure as many sides as possible are nicely browned.


When the tofu is nice and brown, remove it from the pan and set aside. Deglaze the pan with a small bit of the sauce and some water. Let the sauce reduce back to original consistency (maybe a minute) and add the whites of the green onion, along with the grated carrot. They should cook until just softened, with a slight bite to them. Add other vegetables, according to how cooked you want them to be. I had some peas I wanted to use. I shelled them, used the pods in the actual mixture, and saved the actual peas as a fresh garnish at the end (fresh, raw peas are SO good!). I added the pods in about the last 2 minutes so that they stilled retained some of their crunch.

Once the veggies are how you like them, add the remaining sauce and add the tofu back in. Give a stir, just to let the tofu warm again and let everything come together.

Garnish with the greens of the green onion (I also used the fresh peas I'd shelled). Serve with lettuce cups. Enjoy!

Monday, June 11, 2012

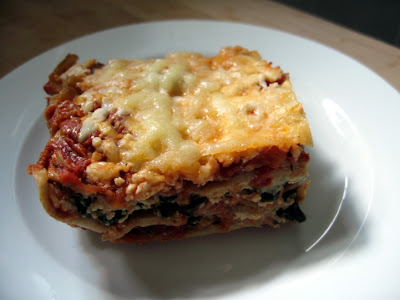
Lasagna

If you wonder whether homemade cheese is worth it, I assure you, it is! We used part of this batch of mozzarella and ricotta for lasagna.


This particular lasagna was a celebration of the fresh cheese we made the other day and the fresh ingredients from the CSA box. It was about half the calories and contains more fiber than your typical meaty, full-fat, white pasta dish, but tasted just as creamy and indulgent as its counterpart, without being greasy.

I made the sauce the night before, so we could quickly assemble the next morning before leaving for the day. I used half strained tomatoes (through the food mill) and half whole tomatoes, broken apart by hand, because I wanted it chunky. I added juicy, thick slices of sauteed mushrooms (sauteed until just soft to retain their moisture), grated carrot (from the CSA box) and plenty of love (among other things).

After running the ricotta through the food processor, it was a little on the wet side (we could have used less milk), so I added an egg to give it structure, along with quickly blanched spinach (chopped spinach into simmering water for literally 1-2 seconds, then strained and immediately into an ice bath) squeezed of its moisture (you can add this rich, green water you squeeze from the spinach into the sauce to retain it) and some parmesan.

The noodles were whole wheat lasagna. If making fresh pasta, you can easily use whole sheets, rather than cutting to noodles.
NOTE: If using dry pasta, par boil to about half of the time listed on the package. This will absorb some extra moisture. If using fresh pasta, make sure to simmer the sauce for a few minutes to reduce it to a thicker consistency, since it won't absorb as much moisture.

Starting with sauce on the bottom (so it doesn't stick to the pan), I layered everything mentioned above, in addition to crumbled veggie Italian sausage (Fieldroast is excellent, if you don't make your own). You could easily use extra veggies (watch the moisture!), meat, whatever you like. You could also omit this layer. I topped with a final layer of pasta, sauce and plenty of mozzarella.

I baked covered w/ foil @ 375F for about 45 minutes, removed the cover and added a little more mozzarella until golden and bubbly. It was about 160F when I took the cover off. An instant-read thermometer should reach 180F (if up to 190F, don't panic) to ensure it's heated through, at which point you can remove it. Let rest for at least 15 minutes to allow everything to settle and for the moisture to balance out. If you've made it ahead, as we did, you should take it out of the fridge a good half hour before putting in the oven.

I garnished with chopped fresh basil (not pictured) to add to its freshness and served with a warm, freshly baked multigrain baguette and a salad with lettuce, arugula (both from the CSA box) and nectarines in a tangy feta, black pepper and yogurt dressing.

Bon appetit!

Friday, May 25, 2012

Zucchini Fritters

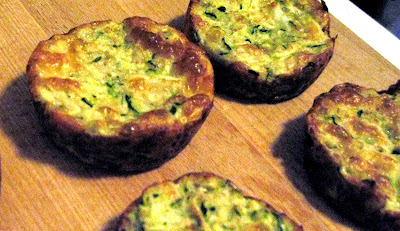
We're going away for a couple of days. Since we're leaving, there was a zucchini in my fridge I wanted to use up. I decided on simple baked zucchini fritters. Rather than baking them in patties, I've found that muffin tins allow for even baking and a lighter texture.

Ingredients:
1 medium-large zucchini
1/2 of an onion
approx 5 tsp whole wheat pastry flour (pretty much any flour would work here)
1/2 tsp baking powder
1 egg
2 oz. light cheddar cheese, grated
salt
pepper
(you could easily add fresh herbs, to taste)

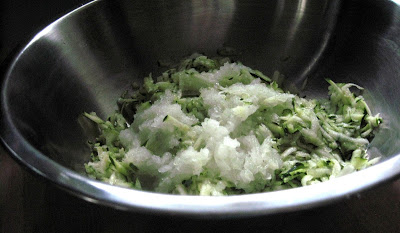
First, I grated the zucchini and onion into a bowl.


Next, I poured the onion/zucchini mixture into a colander and pressed out as much moisture as I could. I sprinkled it with a pinch of salt and gave it a mix. I let it drain for about 20 minutes or so, letting the salt pull out more moisture. When ready, I pressed it again and put it into a medium mixing bowl.

I added the flour, baking powder, egg, cheese, and freshly ground pepper (to taste) and mixed with a spoon until the flour is moist.

I used a medium cookie scoop to put the mixture into an oiled muffin tin and baked at 400F for approximately 20 minutes, until nicely browned and solid in the center. This yielded 9 fritters. If you have a larger zucchini (or using 2 medium ones), add another teaspoon or so of flour and up the baking powder to a full teaspoon.

They were nice and light, while mildly crispy. I usually make these with parmesan, but I liked the texture that the cheddar added. They went well with scrambled eggs for a simple supper :-)


Monday, May 21, 2012

Lemon Spaghetti with Zucchini and Italian Sausage

It's officially summer in our house. The air conditioner is blowing and I've made my first batch of lemon spaghetti of the year.


I love lemon, but I love lemon spaghetti even more. I go back and forth between creamy or not. Tonight I decided on mildly creamy. I also changed things up, adding zucchini and vegetarian Italian sausage.

Tonight's batch included:
  • Zest of 1 lemon, the juice of 2 (medium sized)
  • Whole wheat spaghetti (8 oz dry)
  • Zucchini (large- approx. the length of the pasta), cut into long matchsticks (a mandolin makes this easy)
  • Vegetarian Italian sausage, sliced (I didn't do my own this time, so went with Fieldroast. They make a great Italian sausage, but go with what you like-- meatless or not)
  • Greek yogurt (nonfat, approx 3 oz.- you could easily use low- or full-fat)
  • Salt
  • Pepper
  • Fresh parsley, chopped (approx 2 tablespoons)
  • Parmesan cheese (grated)
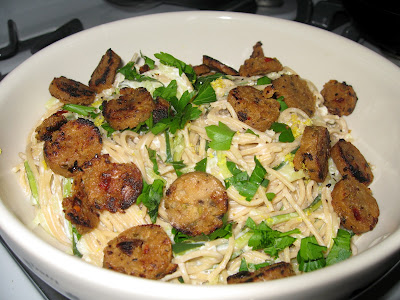
While the pasta water boiled, I sliced the sausage into disks and placed them in a single layer on a hot skillet to cook. The zucchini was cut into long matchsticks to mimic spaghetti. I salted the pasta pot before dropping the dried pasta in to boil. With approx 2 minutes left of boiling time, I tossed in the zucchini (you could steam it separately, for less nutrient loss) and gave everything a stir.

When the pasta was al dente, I poured it all into a colander to drain, retaining about a cup of the pasta water. I squeezed the juice of 1 lemon, the yogurt, about half of the lemon zest, a pinch of salt, and a few grinds of pepper, and a couple of splashes of the pasta water to thin the yogurt and bring everything together. After giving everything a stir and giving it a taste, I wanted more lemon flavor, so I added the juice of another lemon.

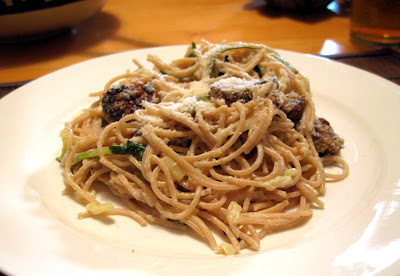
I added the pasta/zucchini mixture to a warm pasta bowl, placed the sausage on top (to retain its crispiness) and garnished with fresh parsley and the remaining lemon zest. We each added a small bit of grated parmesan when on our plates.


It appeared to be hit with my husband. I thought it tasted like summer on a plate (in a good way). The fresh zucchini, parsley and lemon brought out a real brightness when combined. Appearance-wise, the zucchini tends to visibly hide among the "real" pasta (it's nearly half pasta, half zucchini), except where the skin is evident, but it lightens up the dish for the palate and the waistline. The crispy, mildly-spicy sausage brought some welcome texture, too. I'm already looking forward to leftovers.

Monday, May 14, 2012

Smooth(ie) Operator

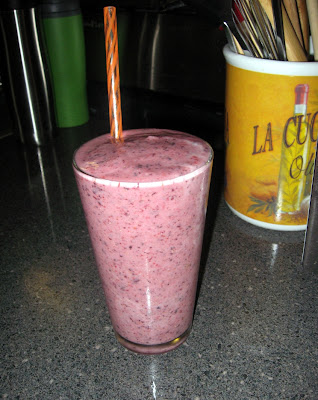
Another reason I love this time of year and its abundant produce? Smoothies on a regular basis. It just feels indulgent and naughty having what basically tastes like a fruity milkshake as the start to my day (or a smaller one as a mid-afternoon snack). I stopped drinking actual juice when I started my whole foods diet (7-ish years ago), because I want the benefit of the whole fruit. This fits the bill.

This batch was blueberry, strawberry (fresh and frozen),  cantaloupe, vanilla yogurt and flax. I love the reusable straws we found :-)


My smoothie rules are basically that there are no smoothie rules, but there are a couple of tricks I like to employ for maximum taste and benefit.

First: I use whatever fresh fruit is on-hand, but the base is always frozen fruit (whether commercially frozen or just leftover fresh fruit that got chunked and frozen). This eliminates the need for ice that just waters everything down. If you're buying frozen, check the ingredients. It should just be fruit, no sugar added.

Second: If it's a meal, I add a little booster. This is usually a teaspoon-ish of flax meal or psyllium husk powder (plain- no extra junk added). You'll note each of these things is milled. It's tough to digest otherwise. WARNING: If using psyllium husks, drink a LOT of water in addition to the smoothie or you will end up with stomach cramps. It will make you full and satisfy you longer, though, when used properly.

Third: If you have an immersion blender, this is an excellent time to use it. Why mess up a whole blender?

So, my smoothies are simple:
  • Fruit: at least half frozen
  • Half a banana- optional (You can freeze the other half for another smoothie. It will look brown, but will be camouflaged by other fruit and taste completely fine)
  • Yogurt (plain or flavored- whatever you prefer). If you don't eat dairy, you could easily substitute soy yogurt or leave it out entirely (I would up the banana to a whole one in this case, for texture)
  • Flax meal or psyllium husk powder- optional (In a pinch I've used oat bran, but it can get gritty)
  • Get creative (or not): fresh spinach or kale, fresh mint, cucumbers (unwaxed), whatever your little taste buds and body desire! If you've never tried it, basil tastes amazing with strawberries, but I've yet to taste a fruit that didn't go well with mint.

I usually start with all of the frozen fruit and yogurt and build from there. If you blend the frozen stuff first, it makes room in the blender cup to add the fresh stuff and any other additives you like.

Tuesday, May 8, 2012

Taco Redux

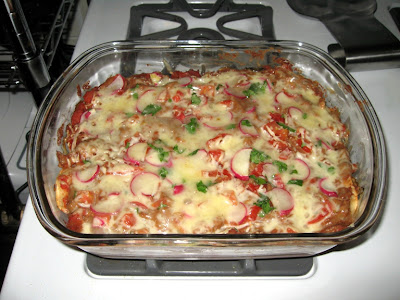
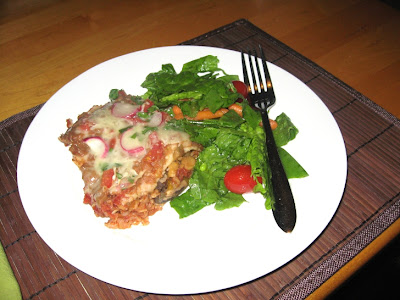
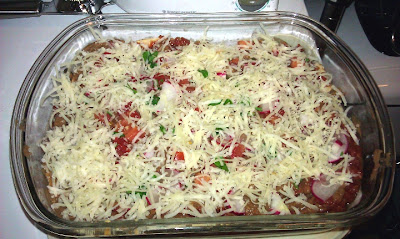
Remember that casserole I made from Cinco de Mayo leftovers? Oh, it was good.


It used up every bit of leftovers, including tortillas. This is how I layered it (bottom to top):

Mexican rice (brown rice, of course)
Chopped tomatoes (leftover from making the rice)
Corn tortillas (single layer- to absorb any extra juice from the tomatoes)
Garbanzo & mushroom mixture
Refried beans (spicy!)
Fresh tomatoes
Radishes (Yes, radishes! They're mild and sweet when cooked)
Chopped parsley
Cheddar cheese (light)

If I'd made meaty tacos, I'd have added the filling in the same place I added the garbanzo/mushroom mixture.


It ended up perfectly moist, but not wet. I served it with a simple green salad and it made for a good, nutritious, comforting meal that was extremely quick.

Monday, May 7, 2012

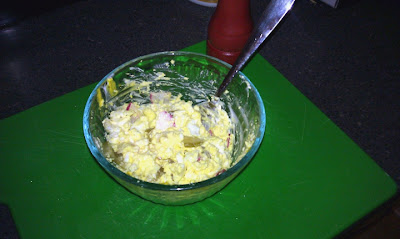
Egg Salad

There is little I like more than a creamy egg salad sandwich on grainy bread.

I should note that I like my egg salad very mustardy. Sometimes, I'll admit I just add a spoonful of mustard to the egg, mash it up, give it a crank of the pepper grinder and be done with it. More often, though, I just go a little heavier on the mustard than other additions and stick to savory items. I change it up, based on what I have on-hand and sounds good. If you like sweeter egg salad, for example, you can substitute sweet pickles for dill, etc.

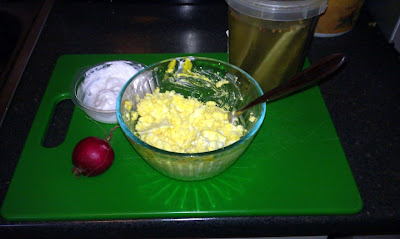
First, of course, I hard-boiled the eggs.

For this batch, I had some open, leftover plain yogurt (Greek). So, instead of just mayo, I did half light olive oil mayo and half yogurt. I used to make my own mayo, but I don't eat it often, so it's easier to use the commercial stuff. It is less fragile than the commercial stuff, so doesn't go bad as quickly. I used deli mustard, but you could use whatever you like (including making your own- also easy). I added a couple twists of pepper, gave a stir and a taste, adjusting accordingly (as usual, my verdict was that it needed more mustard, though I didn't go especially crazy with it). I used 4 eggs, so about 2 Tbl. of dressing (combined).


We still had radishes that needed using (radishes + mustard = perfection, in my book). We also have some amazing dill refrigerator pickles from a local farm, so chopped up a bit of each and added them. They not only add flavor, but extra layers of texture.

I was happy with the taste, so stopped there. Of course, you should add/leave out what you do/don't like.

Sometimes I like to add chopped tomato (or, even better, stuff a big, ripe tomato with the egg salad, forgoing the bread-- soooo good). A dash or two of paprika can be nice, too-- reminiscent of deviled eggs. It should be of no surprise that I'll add pretty much any vegetable I have on-hand to adjust texture/flavor (or just to use them up, if needed).


I kept the sandwich pretty simple, in this case-- just egg salad and a wonderfully-grainy oat bread. It was perfect in its simplicity.

Saturday, May 5, 2012

Cinco de Mayo Fiesta

Hola chicos,

Three final exams down, two to go. Whew! Yes, I actually had a final on a Saturday. A SATURDAY!

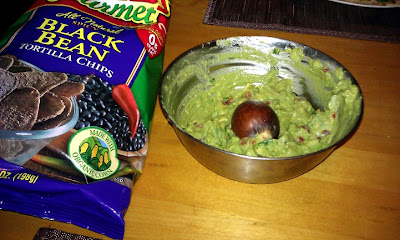
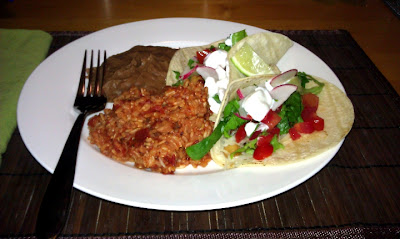
In honor of Cinco de Mayo, I figured we were due for taco night. The offerings of the evening included fresh guacamole with black bean chips, tacos de garbanzos y champiƱones (chickpea & mushroom tacos- my Spanish professors would be so proud), spicy refried beans and Mexican brown rice.

The guacamole was my husband's doing, loosely based on Rick Bayless' recipe from "Authentic Mexican". It was nice and bright and fresh! The object in the middle of the guac is the avocado pit to help keep it fresh (it helps from oxygen getting to the middle part of the guac while we worked our way inward). We ate it with spicy black bean chips from Guiltless Gourmet. Some of their chips are a bit cardboardy, but these were excellent. We've had them in the pantry forever, so was good to finally give them a chance to shine.


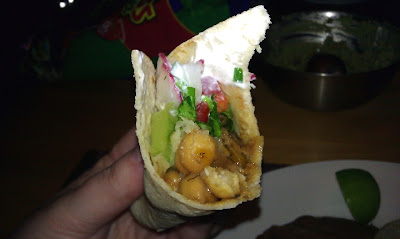
The tacos were messy, but worth it!


First, the taco filling:

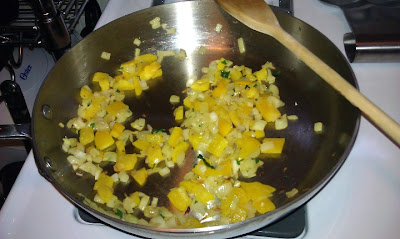
I started with a basic miripoix of onion, garlic and yellow pepper (red, orange, yellow- I usually use one of them). I added the peppers when the onions were not quite translucent.


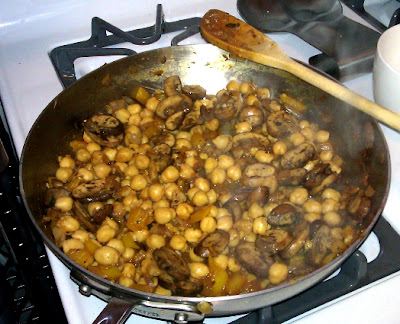
I then added the mushrooms. As things got dry, before the mushrooms released much moisture, I added the juice of half a lemon and a small bit of vegetable broth to deglaze the pan and keep things moving. Once the mushrooms started to break down and create a nice sauce, I added the garbanzos (soaked & precooked or canned are both fine- watch the salt with canned). I mashed a few of the garbanzos to aid in the sauce. I seasoned it (to taste) with salt, pepper, oregano, cumin, cinnamon and paprika. Since I didn't find any chiles at the store that I liked/looked good, I added a bit of red pepper flake for heat. A chopped chili of your choosing would be fine, too. Personally, for tacos, I pick up whatever looks freshest/sounds good at the time. Or, I go with whatever is already in my fridge/pantry. The "smoke" you see is actually steam:


The tacos were made with soft, fresh corn tortillas (very easy to make, but also available in most grocery stores). Heat them up over fire, if you have a gas stove. Otherwise, a skillet or griddle is fine. Heck, if you want to, toss them in the microwave. I won't tell. The main objective is to make them pliable. Of course, if you don't like corn, flour will do.

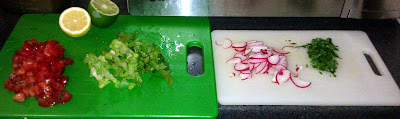
We topped off the filling with light white cheddar, lettuce, chopped tomato, thinly sliced radishes, fresh parsley (we don't do cilantro), a squeeze of lime and plain Greek yogurt. What makes it for me are the radishes. They remind me of really good Mexican street tacos.


They were served up with spicy refried beans and Mexican brown rice. The rice was easy- I threw in all the ingredients (Pomi chopped tomato, onion, salt, chili blend, cumin, a bay leaf, cinnamon and probably a few other things I'm forgetting) into the rice steamer and set it to cook. Allow for about double the time as it takes on the stove top, with a couple of stirs in between so the rice cooks evenly.


The beauty of this meal, beyond the taste, is that it all went really well together. So, instead of packing up the leftover components individually, I layered them all (including some tortillas in the middle) in a casserole dish for later in the week. It will be easy to pop this in the oven to heat through when needed. It's healthy and perfect for when I'm in the weeds of exams and won't want to cook.


¡Nos vemos!

Friday, May 4, 2012

Pizza Night!

Hello, my long lost friends! School has kept me really preoccupied the past several months. I'm happy I'll soon have a break for a couple of months.

First off, I have a new twitter feed! I realized that when I don't have much time to post a real entry, I do have time to tweet. It's not always food-based, but it's likely to be the subject of most tweets. I can be found here: https://twitter.com/eatherselfalive

Now that I'm ramping down for the semester, however (finals began today), I have been getting reacquainted with my kitchen. Since tonight is traditionally "pizza night" in our house, I figured I'd do a healthy spin on it. Since the weather is warmer and we're getting those awesome spring veggies, I'm loving cooking with as many veggies as possible.

I've heard great things about cauliflower crust, so was curious. I'm not gluten free, but welcome any healthy addition to my diet, if it's tasty. I figure I'd do a side-by-side comparison with homemade whole wheat flat bread.

Cauliflower Crust

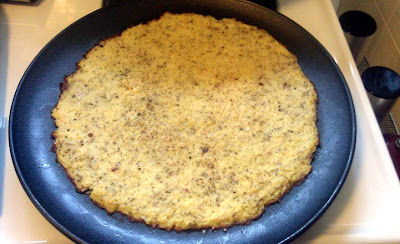
The cauliflower crust is easy: a cup of chopped cauliflower to 1 egg (if you don't do egg, I imagine flax and water would be a suitable binder). I added Italian herbs and crushed red pepper then pressed onto the pan (not too thin). It took about 15 minutes @ 450 (no toppings yet). It could easily be doubled.

This is the cauliflower crust straight from the oven before topping:


Homemade Flat Bread

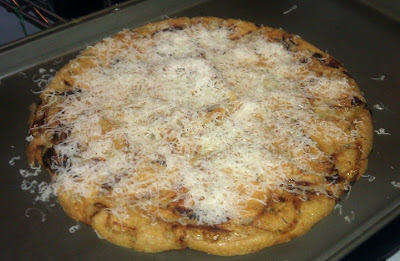
I've made pizzas from a myriad of flat breads (tortillas, lavash, naan), but this one's the easiest to make. It's also quick and whole grain (traditionally it's chickpea flour, but other whole grain flours work well, especially whole wheat and cornmeal). I made the batter (1c whole wheat flour, seasoned w/ salt & approx 1 1/2c water- incorporate slowly until like a thin pancake batter) and heated a cast iron skillet with the oven to 450 degrees (farenheit) and placed some olive oil in the pan w/ thinly-sliced onions sprinkled with thyme. After a couple of minutes, I gave the onions a stir to ensure evenness and poured the batter in the pan to bake for about 30 min.

This is the flat bread out of the oven w/ some grated manchego cheese:


Now for the toppings!

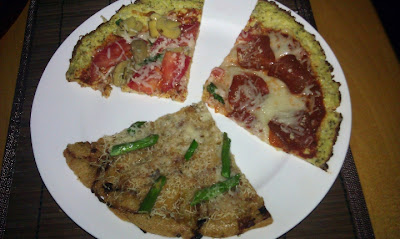
I added tomato sauce and mozzarella to the cauliflower crust and topped half with marinated mushroom, tomatoes and fresh basil. I topped the other half with turkey pepperoni, then put it under a hot broiler for a few minutes (keep an eye on it- it's done when the cheese is melted).


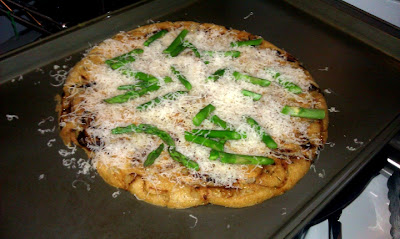
For the flat bread pizza, I left things simple. I blanched some asparagus, chopped it up and placed it on top with the manchego. The caramelized onions and the manchego on their own make for a yummy combo. The asparagus was the icing on the proverbial cake. Once topped, I baked it in a moderate oven for about 7 minutes (again, until the cheese melted). I didn't catch a photo of the finished product (whole), but here it is before it hit the oven again:


The verdict...

It was a tie! I was surprised that my favorite between the two crusts was the cauliflower. It was great with the tomatoes and mushrooms. I also liked the other pizza, mostly because it wasn't traditional. .100% whole wheat overtakes the more traditional pizza toppings, in my opinion. My husband preferred the flat bread, though he also enjoyed the mushroom tomato combo on the cauliflower. The pepperoni didn't mesh very well with the delicate grain-free crust. I think I'll stick to fresh vegetarian toppings for this one.

I should note that these 3 pieces filled me up! Considering two of the slices were on a vegetable-based crust, that's pretty great. Dessert will be some fresh melon :-)