Showing posts with label gluten free. Show all posts

Thursday, August 2, 2012

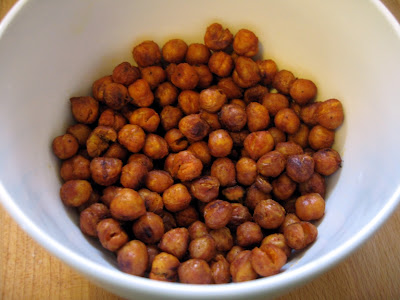
Crunchy Roasted Chickpeas


This little snack packs as much of a seasoned punch as you like. They're crunchy, full of fiber and very satisfying. For me, they're like a healthier version of wasabi peas. The whole thing can be seasoned to taste, depending on what you like. If you don't have chickpeas, there are other beans work just as well. Black beans, for example, are excellent with chili & lime seasoning. If spicy isn't your thing, just some herbed salt is also wonderful. The trick is using beans that keep their shape well and retain some structure (unlike, navy beans, for example, which have a high moisture content when cooked).

Roasted Chickpeas (Garbanzos)
  • 1 c. cooked, whole chickpeas, drained (canned will also work)
  • 1 Tbl. olive oil
  • 1 tsp. Paprika
  • 1/2 tsp. of cumin
  • pinch of cayenne
  • Sea salt, to taste
1) Preheat oven to 400 F
2) Pour beans into a mixing bowl. Add olive oil & mix. Season, adjusting to taste.
3) Pour mixture onto baking sheet and roast for approx. 15 min, then mix again on sheet.
4) Bake approx. 15 more minutes, or until crispy
5) Place on a clean, cool baking sheet to cool before storing in an airtight container

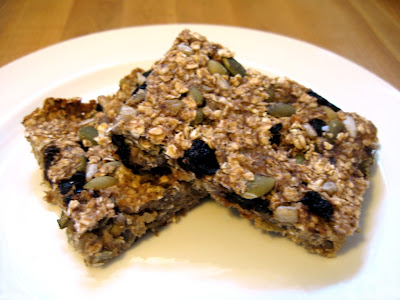
Fruit-Sweetened, Nut-Free Granola Bars


Warning: Making these WILL make your house smell like oatmeal cookies.

These were born out of wanting to change things up with my usual homemade granola bars. After some googling for inspriation, I stumbled across this recipe from the Cookin' Canuck. Plenty of grainy goodness and no additional sweetener needed? Excellent.

Of course, I made a few modifications. For one, since I'm deathly allergic to tree nuts, I replaced the nuts with a mix of sunflower and pumpkin seeds. I also upped the seeds and applesauce and went with an unsweetened dried fruit.

Nut-Free, Fruit-Sweetened Granola Bars (Yields 16 bars)
  • 3 1/2 c. whole oats
  • 1/2 c. sunflower seeds (shelled- raw, if available)
  • 1/2 c. pumpkin seeds (shelled- raw, if available)
  •  3 large, ripe bananas
  • 1 c. applesauce
  • 1/2 c. chopped, dried unsweetened cherries
  • 2 tsp. cinnamon
  • 1 tsp. cardomom
  • 1 tsp. salt
  • 2 Tbl. flax seeds
  • Olive oil spray (or olive oil in a mister)
1) Preheat oven to 350 F.
2) Mash banana and add applesauce, cherries, cinnamon & cardomom and let rest while oats & seeds are toasting. This will allow the cherries to plump back up a bit.
3) Pour oats & seeds onto a baking sheet sprayed with olive oil. Spray the top of the oat mixture lightly with olive oil
4) Place oat mixture into pre-heated oven until lightly toasted (approx. 10-15 min.), stirring every 3-4 minutes to evenly toast
5) When oat/seed mixture is out of the oven, let cool for 5-10 minutes then sprinkle salt and flax. Mix on baking tray to combine & pour into banana mixture
6) Stir until incorporated and pour into a 9x13 pan lined with parchment paper or foil sprayed with cooking spray, overlapping sides for easy removal
7) Let cool in pan approx. 10-15 minutes & remove from pan, using foil/parchment, then cool on wire cooling racks.
8) Slice into bars when cool

Monday, June 18, 2012

Lettuce Wraps

As much as I love sushi, I often feel the lack of vegetables if eating just a couple of rolls. Yeah, we could have a couple of veggie rolls, but I wanted more. I also had a hunch that a straight forward salad wasn't going to work for me, either. So, as a supplement to our sushi, I mixed cuisines and decided to make some lettuce wraps-- specifically, tofu lettuce wraps.
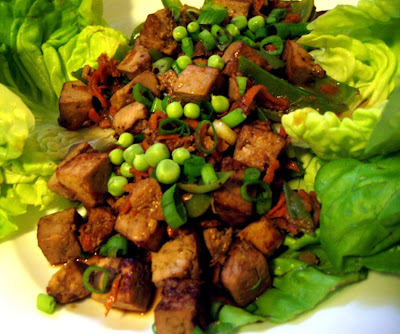

Now, I know what you might be thinking... tofu? Yes, tofu. In its raw, naked state, it can be less than appealing. It's pretty much flavorless and the texture can be anywhere from wet paper to jello. Prepared well, though, it can do just about anything! I should clarify that we're not talking about silken tofu here, which is an entirely different ballgame (also good, but handled differently- we can discuss that another time).

The real secret to working with tofu is pressing it. This removes some of its moisture to take away the jiggly-ness, improving its texture, and making way for some actual flavor. Since it doesn't have much taste on its own, it can can be seasoned in pretty much any manner you want.

These lettuce wraps are the perfect thing for rounding out an otherwise light meal. The spicy, warm filling wrapped in the cool, refreshing lettuce cups are a sweet summer combo.

Tofu Lettuce Wraps
  • 1 block extra firm tofu, pressed and cubed (I actually pressed it 4 times to get the right texture- twice whole, once in cutlets, once in strips)
Marinade:
  • 1/2 c low-sodium soy sauce (gluten-free, if applicable)
  • 1/4c neutral flavored or peanut oil (1 Tbl. reserved for sautéing)
  • 1/4c rice wine vinegar
  • 2 cloves garlic, minced
  • 1 tsp. grated ginger
  • 1 Tbl. honey (or sweetener of choice, adjusted to taste)  
Sauce and serving:
  • 1 Tbl. hoisin sauce (see note)
  • Sriracha, to taste (optional- you could easily substitute with red pepper flakes or leave it out entirely if you can't do spicy foods or your hoisin is spicy enough)
  • green onion (whites and greens, sliced, divided)
  • 1 medium carrot, grated
  • 1 tsp. sesame oil (optional)
  • other vegetables you may want to use up
  • 8 small-ish lettuce cups or 4 large, split in half
Note: If you don't have hoisin sauce, it's easy to make, including without gluten (a Google search will yield plenty of recipes). Alternately, add approx 1 tsp natural, unsweetened peanut butter to final sauce and adjust seasonings as you like.

Combine the first 7 ingredients, whisk to emulsify. Adjust seasonings to taste. Marinate cubed tofu for 1 hour (or as long as you can within that hour). If longer than an hour, make sure it's refrigerated, for food safety.

Once the tofu is marinated, drain the marinade into a bowl and give the tofu a slight blot with a paper towel so that it will properly sauté instead of steam. The beauty of only using tofu and vegetable ingredients is that the drained marinade can be used to start the final sauce. Add the hoisin sauce (or peanut butter) and whisk to combine.

In a medium-hot, large skillet (not nonstick), add approx. 1 Tbl. vegetable oil (peanut, soybean, canola, grapeseed, etc) and distribute evenly. It takes a surprisingly small amount of oil to get a nice crust on the tofu, which means building more flavor. Just as you see wisps of smoke, add the tofu to the pan in as even a layer as possible. As the tofu sears and is ready to turn, it should release from the pan somewhat easily. Give a turn every few minutes to ensure as many sides as possible are nicely browned.
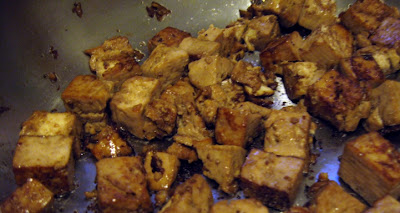

When the tofu is nice and brown, remove it from the pan and set aside. Deglaze the pan with a small bit of the sauce and some water. Let the sauce reduce back to original consistency (maybe a minute) and add the whites of the green onion, along with the grated carrot. They should cook until just softened, with a slight bite to them. Add other vegetables, according to how cooked you want them to be. I had some peas I wanted to use. I shelled them, used the pods in the actual mixture, and saved the actual peas as a fresh garnish at the end (fresh, raw peas are SO good!). I added the pods in about the last 2 minutes so that they stilled retained some of their crunch.

Once the veggies are how you like them, add the remaining sauce and add the tofu back in. Give a stir, just to let the tofu warm again and let everything come together.

Garnish with the greens of the green onion (I also used the fresh peas I'd shelled). Serve with lettuce cups. Enjoy!
Friday, May 4, 2012

Pizza Night!

Hello, my long lost friends! School has kept me really preoccupied the past several months. I'm happy I'll soon have a break for a couple of months.

First off, I have a new twitter feed! I realized that when I don't have much time to post a real entry, I do have time to tweet. It's not always food-based, but it's likely to be the subject of most tweets. I can be found here: https://twitter.com/eatherselfalive

Now that I'm ramping down for the semester, however (finals began today), I have been getting reacquainted with my kitchen. Since tonight is traditionally "pizza night" in our house, I figured I'd do a healthy spin on it. Since the weather is warmer and we're getting those awesome spring veggies, I'm loving cooking with as many veggies as possible.

I've heard great things about cauliflower crust, so was curious. I'm not gluten free, but welcome any healthy addition to my diet, if it's tasty. I figure I'd do a side-by-side comparison with homemade whole wheat flat bread.

Cauliflower Crust

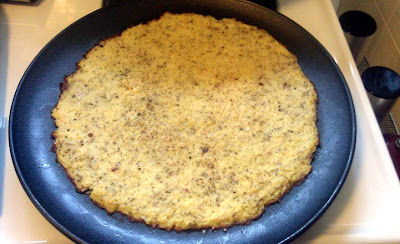
The cauliflower crust is easy: a cup of chopped cauliflower to 1 egg (if you don't do egg, I imagine flax and water would be a suitable binder). I added Italian herbs and crushed red pepper then pressed onto the pan (not too thin). It took about 15 minutes @ 450 (no toppings yet). It could easily be doubled.

This is the cauliflower crust straight from the oven before topping:


Homemade Flat Bread

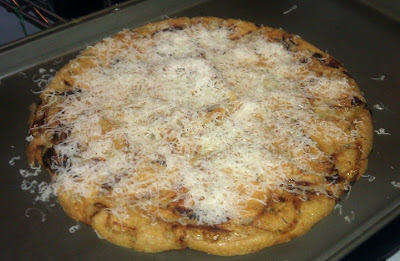
I've made pizzas from a myriad of flat breads (tortillas, lavash, naan), but this one's the easiest to make. It's also quick and whole grain (traditionally it's chickpea flour, but other whole grain flours work well, especially whole wheat and cornmeal). I made the batter (1c whole wheat flour, seasoned w/ salt & approx 1 1/2c water- incorporate slowly until like a thin pancake batter) and heated a cast iron skillet with the oven to 450 degrees (farenheit) and placed some olive oil in the pan w/ thinly-sliced onions sprinkled with thyme. After a couple of minutes, I gave the onions a stir to ensure evenness and poured the batter in the pan to bake for about 30 min.

This is the flat bread out of the oven w/ some grated manchego cheese:


Now for the toppings!

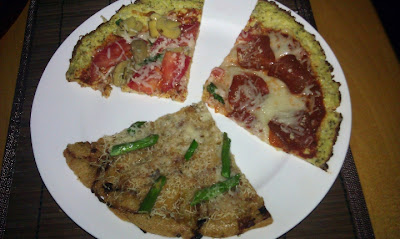
I added tomato sauce and mozzarella to the cauliflower crust and topped half with marinated mushroom, tomatoes and fresh basil. I topped the other half with turkey pepperoni, then put it under a hot broiler for a few minutes (keep an eye on it- it's done when the cheese is melted).


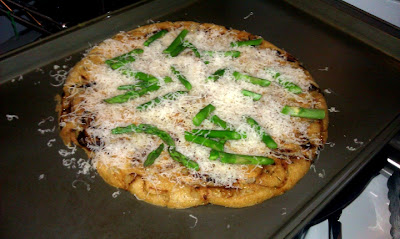
For the flat bread pizza, I left things simple. I blanched some asparagus, chopped it up and placed it on top with the manchego. The caramelized onions and the manchego on their own make for a yummy combo. The asparagus was the icing on the proverbial cake. Once topped, I baked it in a moderate oven for about 7 minutes (again, until the cheese melted). I didn't catch a photo of the finished product (whole), but here it is before it hit the oven again:


The verdict...

It was a tie! I was surprised that my favorite between the two crusts was the cauliflower. It was great with the tomatoes and mushrooms. I also liked the other pizza, mostly because it wasn't traditional. .100% whole wheat overtakes the more traditional pizza toppings, in my opinion. My husband preferred the flat bread, though he also enjoyed the mushroom tomato combo on the cauliflower. The pepperoni didn't mesh very well with the delicate grain-free crust. I think I'll stick to fresh vegetarian toppings for this one.

I should note that these 3 pieces filled me up! Considering two of the slices were on a vegetable-based crust, that's pretty great. Dessert will be some fresh melon :-)