Showing posts with label chicken. Show all posts

Thursday, March 14, 2013

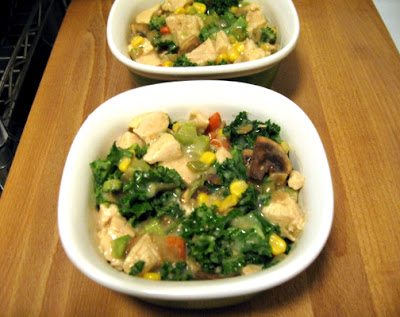
Easy, Make-Ahead Chicken Pot Pie

Happy Pi(e) Day! I was really craving chicken pot pie a couple of weeks ago, so I whipped up a batch of filling for the freezer. That way, we could just pull out some individual servings, mix a quick crust, and have it whenever we wanted. It's so satisfying! I went with a biscuit crust because, well, it's really easy and fast and I'm not all that crazy about pie crust to begin with. Pot pie filling is very simple, but it's even easier to do it batch-style and just defrost in the microwave while whipping up the biscuit dough so you can pop it in the oven quickly. It's so much more worth it than the pre-made boxed kind. And you know (and can pronounce) all of the ingredients. This recipe easily doubles (or triples).

Chicken Pot Pie Filling (makes 4 generous servings):
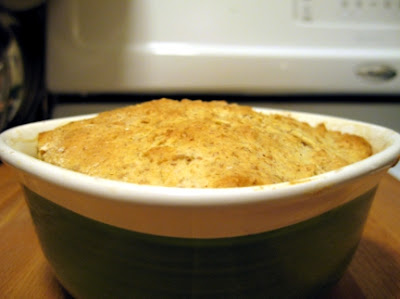
My husband put this together (photo and all) while I studied in the other room. Hooray for easy freezer food!

Ingredients:
  • 2 skinless chicken breasts, poached (if you've de-boned it yourself, toss the bones in the poaching liquid for extra flavor!). See *note below.
  • Whatever vegetables you like! Onion, carrot, and celery are a given for me, but I toss in whatever else is my whim in the moment or what is staring back at me from the crisper. This time I added mushrooms, broccoli, corn, and kale. I generally do about a 2:1 or 3:1 ratio of vegetables to meat. You could easily make this vegetarian, too, and leave the meat out of it.
  • 2-3 c. chicken veloute (see below)

Directions:
  1. Poach the chicken breasts. You can do this in seasoned water, but if you have chicken or vegetable stock around or some stock paste (Better than Bouillon is pretty great), even better. Once you are done, save the poaching liquid! You'll need some of it for the veloute.
  2. Saute whichever vegetables will need extra cooking time beyond the oven (e.g. onion, carrot, celery, mushrooms) until just starting to soften, so they don't overcook. You just want to give them a little head start.
  3. After the chicken has been removed, strain the poaching liquid and set it to simmer.
  4. In a large skillet, heat 2 Tbsp. olive oil and whisk in 2 Tbsp. flour to form a paste (roux). Whole meal flours may get a little gritty, so white flour is traditional here. In this case, I don't mind white whole wheat. If using veloute where it's more exposed, a smoother texture is much more preferable. (A purist would use butter instead of olive oil, but I don't even keep it in the house. I'm a real rebel.)
  5. Stir the roux over low heat until just beginning to turn golden. You want to keep it light in color (and flavor). 
  6. Slowly whisk in the liquid 1/2 c. at a time until approx. 2-3 c. have been absorbed. Simmer for 1-2 min. to thicken (it will thicken further upon cooling). It should be the consistency of a light gravy when finished. If it's too thick, you can always add a little more stock to thin.
  7. Shred or cube the chicken and mix with vegetables in a large bowl.
  8. Stir in veloute. Add half and slowly incorporate the rest to taste, desired consistency (this can depend on personal taste and the vegetable assortment).
  9. Pour filling in individual containers. At this point, you can freeze it for later use or bake it up in some pies!
  10. For a crust, just use your favorite biscuit recipe. You'll want enough for approx. 1/3" layer of dough to cover each. Pierce the dough before baking to keep from over-rising. Then again, if you want it fluffy and more dumpling-like, forgo the piercing and bake as-is.
  11. Bake at 400° F for approx 25 min, or until it reaches an internal temperature of 165
    °F in the middle
  12. Enjoy!
*Note: poaching lean meat, like skinless chicken breast, is a great way to keep it from drying out. It's not actually the liquid that keeps it moist, but the process. High temperatures can cause the muscle to tense, essentially squeezing out extra moisture the longer it cooks. The slow poaching leaves it nice and relaxed while still bringing it up to a safe internal temperature. The nice thing is that the temperature for poaching (aim for ~160-165°F) is in the same neighborhood as the desired internal temp, so it is almost impossible to overcook. Periodically check the temperature of the liquid and adjust. Look for bubbles that are about to break, just below a simmer. If you have a cool infrared thermometer, it makes it super easy (I love being married to a tech geek), but an instant read thermometer will also do. The chicken should be removed when it's approx. 160°F (internal) so that residual cooking will bring it up to the safe internal temp of 165°F.

Thursday, August 30, 2012

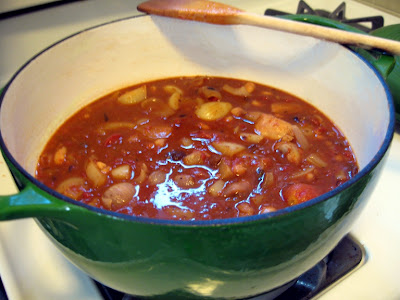
Moroccan Inpired Chicken Stew


Our tiny little town is finally getting a sushi place soon, and we have surprisingly good Mexican food available, but beyond that we're pretty much a college town pool of (heavily Americanized) Chinese & pizza. There certainly isn't any African food nearby, even in the neighboring "big" city, so we have to make it ourselves. Moroccan and Ethiopian cuisines are two of my favorites. Now that it's no longer available down the street or around the corner from me, you'll probably be seeing more of it here. The nice thing about each of those regions is that there are some amazing tasting foods that can also be quite healthy-- no real adjustment needed.

I didn't bust out the tagine just yet, but I can sense that will happen soon after the temperatures drop a little lower. This recipe isn't exactly authentic, but it definitely has some Moroccan roots and flavor profiles. The warm spices and rich sauce pair well with a bed of couscous. I used chicken thighs and legs, but you could use any meat that braises well or bump up the veggies and keep it vegetarian. Root vegetables work especially well. If using meat, you want enough connective tissue to break down and keep it from drying out. I left  the bones in, but removed most of the skin to take the fat content down. The sweet/savory combination is more traditional, but I know some don't really enjoy it. If you're one of them, leaving out the honey and dried fruit will still make for a tasty dish.

Moroccan-Inspired Chicken Stew

  • 1 Tbl. extra virgin olive oil
  • 1 large onion, chopped (I keep the pieces pretty large for this dish, but you can chop more finely if you don't enjoy directly tasting onions)
  • 2 bell peppers, chopped (I used white because it's what I had- you can use whichever color you prefer)
  • 6 chicken thighs or legs (or 3 of each), bone-in, skin removed
  • 2 c. cooked (or canned) chickpeas or other hardy beans, drained
  • 2 c. chopped tomatoes (paste tomatoes, if you've got them) or 1 large can w/ juices
  • 2 c. chicken stock (low sodium, if possible)
  • 1 tsp. cinnamon
  • 1 tsp. ginger
  • 1 tsp. cumin seeds (if using powder, 1/2 tsp.)
  • 1 pinch cayenne
  • agave nectar or honey to taste (a couple drops of liquid stevia would work if you want less sugar)
  • 1/2 c. dried fruit, roughly chopped (apricots are pretty traditional, but I don't really like them, so usually use prunes, a.k.a. dried plums, or raisins)
  • salt & pepper, to taste
  • toasted almond slivers or sunflower seeds for garnish (optional)
Note: As you move along this recipe, season conservatively, as the sauce will cook down and flavors will become concentrated. You can adjust seasonings when it's reached the desired consistency.

1) In a large dutch oven (non-reactive), heat on medium-high heat and add oil. Add onions when the oil is hot.
2) Sautee onions until just glossy and add peppers.
3) Dry chicken with a paper towel. When peppers begin to soften, push the peppers and onion to the sides of the pot and add chicken in a single layer. Sear on each side for a minute or two, until browned.
4) Add tomato juice and chicken stock to deglaze the pot, making sure to get all of the brown bits on the bottom.
5) Add beans, prunes, cinnamon, ginger and cumin.
6) Simmer on low for approx. 30-45 minutes, until thickened.
7) Once the tomato juice and stock have cooked down, adjust seasonings, including salt and pepper, to taste and add honey/agave. Start with a tablespoon or so of sweetener and go from there.
8) Serve over couscous or quinoa and garnish with almonds or toasted (shelled) sunflower seeds (for those who are nut-free, like I am).

Thursday, August 23, 2012

Chicken Souvlaki

When asking my husband for dinner requests, he mentioned souvlaki. Since I had also made feta recently (which I'll be posting soon), it was easy to add to the menu. The tzatziki was also an excellent way to use some of my homemade Greek yogurt.

 
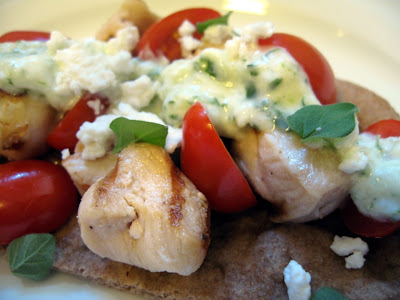
Pictured with fresh grape tomatoes, feta cheese, tzatziki, whole wheat pita and fresh oregano. The marinade and quick cooking allow for very moist chicken.

I served the skewers with a salad of roasted beets sprinkled with the homemade feta. While I used chicken this time, you could easily prepare this with lamb or just about any other meat. You could also just marinate some pressed tofu cubes and use them, if you swing that way. I'd planned on making my own pita, but didn't have time. Pocketless pita is the only whole wheat kind the market had, so we just rolled with it. It was kind of like a big, Greek soft taco.

In addition to the chicken, I also made separate vegetable skewers with zucchini and yellow pepper, sprayed with olive oil and brushed with the marinade, grilling until done. Eggplant would also work beautifully.

Chicken Souvlaki
  • Boneless, skinless chicken, approx. 4 thighs or 2 breasts (if using a mixture of both dark & white meat, keep them separate so they cook evenly)
  • Juice of 4 lemons
  • 1/4 c. olive oil
  • 2 Tbl. fresh oregano (or 1 tsp dried)
  • 2 cloves garlic, minced (or 1 tsp. dried)
  • salt, to taste
  • tzatziki (recipe below), whole wheat pita, vegetables and feta cheese for serving
Cut chicken up into approx. 1" cubes and place in a plastic zipper bag. In a small bowl, mix the lemon juice, olive oil, oregano, garlic and salt. Whisk until emulsified together. Pour all but a couple of tablespoons into the bag with the chicken. Close bag and let it marinate, anywhere from 30 minutes to overnight, moving the contents occasionally to ensure even marinating.

Soak 5-10 bamboo skewers in cool water for approx. 30 minutes before assembling and cooking. The number of skewers depends on whether you'll also be doing vegetable skewers. Slide 5-6 pieces of chicken onto each skewer, being careful not to crowd.

Grill on a hot grill for a couple of minutes on each side, until cooked through, brushing with the reserved marinade (NOT the actual marinade used on the raw chicken).

These cook quickly, so be careful not to overcook them. Let the chicken rest off of the grill for a few minutes before serving. Meanwhile, you can warm the pita on the hot grill.

Serve with tzatziki, vegetables, warm pita and feta cheese

Tzatziki
  • 1 c. Greek yogurt
  • 1 cucumber (unwaxed or English)
  • 3 Tbl. lemon juice
  • a splash of olive oil
  • salt to taste
  • 1 Tbl. of finely chopped fresh dill (optional)
Grate cucumber on a box grater. If you like a chunkier sauce, you could also cut into small pieces vs. grating. Lightly salt the grated cucumber to help release its juices (you don't want the straining of the yogurt to go to waste by adding more moisture). Let sit and drain for approx 5-10 minutes. Gently squeeze out any remaining moisture with your hands and add to a small mixing bowl. Add remaining ingredients, seasoning to taste. Chill until ready to use. This is also excellent as a veggie dip and sandwich spread.

Tuesday, July 17, 2012

An Indian-Inspired Feast

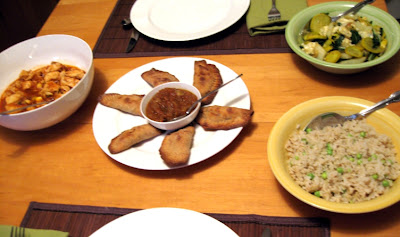
After seeing "The Best Exotic Marigold Hotel" (excellent film), I knew Indian food was in our near future. I could practically smell everything they were eating through the screen. While the theater was just a few blocks from one of our favorite Indian restaurants, I knew we could eat more healthily at home and still be satisfied. I missed having roti (whole wheat flat bread, similar to naan) as part of the meal, but that was a little more starch than I should be eating in one sitting with samosas and rice, so I left it out this time.

On the menu:


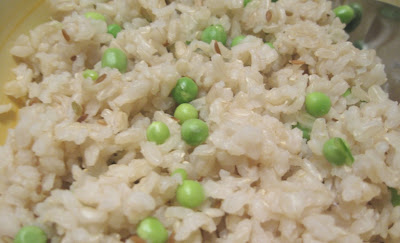
The rice was easy and straight forward. I was out of brown basmati rice, so went with regular brown long grain (sprouted, if you have it). I mixed in some cumin seeds in with the rice (approx. 2 tsp. per cup of dry rice) and steamed in my rice cooker. Once done, I mixed with some freshly-shelled peas (you can save the pods for another dish). If using frozen peas, you could add them before cooking. I would just skip the peas in that case, but you may feel differently. The cumin seeds add a wonderful fragrance.


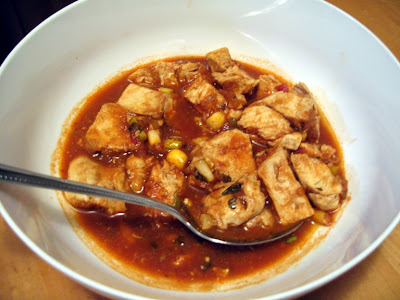
The chicken tikka masala was the only real "cheater" dish. I would have made my own sauce, but I've had a jar of Trader Joe's Masala Simmering Sauce in our pantry for a while and was curious to try it. I was doing enough that I figured jarred sauce was justified. It tasted pretty good. For nights when I want to throw something together quickly, I may use it again (though the nearest Trader Joe's is hours away). I like that they don't add a bunch of unnecessary, unpronounceable ingredients. The only thing I added aside from chicken, the sauce & water (the sauce is concentrated) is some sliced scallions (white and light green only). The sauce is very easy to make, though. Google for recipes, if desired (I kind of wing it and haven't paid much attention to proportions of ingredients... next time I'll make a note of it as I'm doing it).

Here's a little trick: If the sauce is too thin, a little pumpkin or other winter squash puree is a great way to thicken without adding oodles of cream or fat. I usually keep a can of pumpkin puree (not pie filling) on-hand, just for those situations. And you then have an excuse to make muffins out of the remaining puree (mmm...).

One of my only complaints about this dish in restaurants is that the chicken is often dry. It seems an insult to the lovely, velvety, sweet/savory sauce it usually accompanies. Prolonged cooking can kill white meat chicken. Fast cooking can also do the same, if you're not careful. The muscle tenses with harsh heat and, in that process, can squeeze the moisture right out.

One tip for getting the most moist chicken breast you've encountered... poach it! This is especially gentle if using boneless, skinless breasts. I pulled the skin off, then de-boned the breast and used the bones for added flavor in the poaching liquid. Fill a pot with cool water, add aromatics & spices (I used an onion, a few sprigs of thyme and tarragon, along with a cinnamon stick, cardamom pods, salt, pepper) and bring the water until just below a simmer (approx. 170 F, poaching is between 160 F & 180 F). Once the water is up to temp, add the chicken breast (whole). Check with an instant read thermometer after 15 minutes. Remove from heat when the internal temp reaches 160 F. It will come up to 165 F while resting. Let rest for at least 10 minutes before cutting. Cube and add to the preheated sauce just to warm everything through.


The gulab jamun (one of my most favorite desserts on the planet) was good, but not great. The flavor was spot on, but the texture and leavening was slightly off. This was my first time making it, so I'd like to make a few more tweaks before posting the recipe.

Monday, June 11, 2012

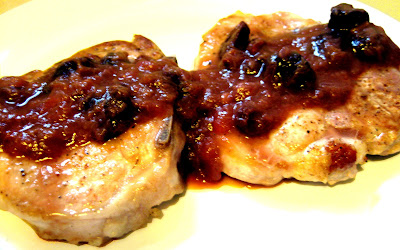
Pork Chops with Cherry Rhubarb Sauce

When we got our CSA box this week, the only thing for which I didn't have a zillion ideas was rhubarb. It's often used in sweets, like my mother-in-law's amazing strawberry rhubarb pie, but I already had though about making rhubarb bread, so didn't really want to bake with it again. Then I remembered having pork chops with a sweet and tart sauce from rhubarb and dried fruit (I think it may have been figs).

On a recent trip to Trader Joe's, I'd picked up some dried cherries. Finding them without added sugar is difficult, so I like to stock up whenever we're there (the closest TJ's is hours away, so we don't get there often). I figured they would pair well with the rhubarb. One could easily use any dried fruit for this (I often use raisins with pork- plump in the same method as the cherries).

This can easily be doubled or even tripled. You could also grill the chops, if you like, and just make the sauce separately. Chicken thighs would also work nicely (adding baking time).

Pork Chops with Cherry Rhubarb Sauce


2 bone-in pork chops, trimmed of excess fat (some fat is necessary)
olive oil
1/4 onion, chopped (I'd have used a shallot, if I had it on-hand)
1 clove garlic
1/4 c dried bing cherries (or other dried fruit)
1/2 c rhubarb, chopped
1 tsp balsamic vinegar
salt, pepper and thyme to taste
1 TBL maple sugar (or any sweetener you prefer-- pure maple syrup or brown sugar would also work nicely)
water or stock

Preheat the oven to 400F. Make sure to take the chops out of the refrigerator a good 1/2 hour before cooking to bring up to room temperature. Dry them off with a paper towel, so that you don't steam them instead of searing.

Soak the cherries in warm water and a little balsamic vinegar. While they plump up, chop the onion and some garlic and add them to a saucepan with some olive oil until glossy. Add the rhubarb to let it marry with the aromatics.


Next, add the cherries in the juices and just enough water (or stock) to cover, salt, pepper and thyme. I simmered until the rhubarb was softened, reduced to thicken slightly (about 1/4) and adjusted seasonings. Once finished, take the sauce off the heat and go to work on the chops.

Season liberally on both sides with salt and pepper.

Heat a large heavy skillet on medium-high heat until hot (NOT non-stick). Add a small amount of olive oil once the pan is to temperature, using a spatula to evenly spread the oil. Add the chops (quickly, or the oil will begin to burn) and don't disturb them for a couple of minutes. As soon as the pan releases the chops (2-3 minutes), turn them over and let them sear on the other side for a couple minutes.

If using a heat-proof skillet that fits all chops, pop it in the oven until they reach approx 140F (They will come up to temp with residual cooking while resting. FDA recommends 145F), which should take about 5 or so more minutes, depending on thickness. If the skillet is not oven-proof, simply move to a baking dish to finish cooking.

Let rest, tented in foil, for about 15 minutes, so it has time to reabsorb any juices. While resting, add the rhubarb sauce to the skillet to pick up the lovely bits from searing.

This pairs well with seasoned whole wheat couscous and a nice salad for a lovely summer meal.