Showing posts with label cheese making. Show all posts

Tuesday, July 17, 2012

Summer Squash and Bok Choy Paneer


I love palak/saag paneer. I've gotten various answers from a few Indian friends as to the difference between saag and palak. Both tend to mean spinach in the restaurants I've frequented, but one friend said that one was actually mustard greens (I forget which). Another said that one is creamy (think creamed spinach) and the other isn't, but restaurants don't seem to keep consistent to that distinction, either. I prefer non-creamy, whatever the vegetable.

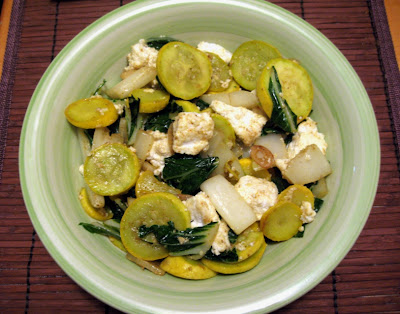
This version doesn't contain either spinach or mustard greens, but it's somewhat of a tribute. Much like the samosas I made for the same meal, this is also an excellent opportunity to use whatever vegetables you may have that sound good, ending with a wonderfully tasty vegetable dish. Case in point-- I was planning on just using kale, but when I went to dig it out of the veggie drawer, I found it had gone south on me. In a 3-second re-think, I grabbed the bok choy and summer squash instead. Oh, and it's an excuse to make cheese. That's hardly a negative in this house. I loved the silkier mouth feel of the freshly-pressed paneer, for a perfect mixture of textures. Don't panic when the cheese doesn't melt. It's not supposed to.

I have no idea how to say "bok choy" or "summer squash" in Hindi, but however it's translated, it's also yummy and light. The fresh cheese brings an indulgent feeling to the table, without actually being overly decadent.

Ingredients:
  • 1 Tbl. olive oil
  • 2 summer squash, sliced into 1/4" slices
  • 3 leaves/stalks of mature bok choy (or one head of baby bok choy), roughly chopped, white stalk and greens separated.
  • 2 cloves garlic, sliced thinly
  • salt, to taste
  • cayenne, to taste (optional)
  • *garam masala 
  • **paneer from 1 half gallon milk, cubed (If buying this, approx 6-8 oz.)
1. Heat the oil in a hot skillet
2. Toast oil for just a few seconds (3-5), until just starting to turn golden (careful, if it burns, you'll be starting over) and remove from the pan.
3. Add squash, the whites of the bok choy & a pinch of salt and sautee until you start to see their moisture escaping into the pan, stirring frequently
4. Add bok choy greens & paneer and stir every few seconds to ensure everything cooks evenly and the greens are just soft, but not overcooked
5. Adjust seasonings, as needed

* Garam Masala: (Which essentially just means a blend of dry spices. There is no, single garam masala mixture. This is approx. what I used, but you could substitute/adjust as you see fit or add a curry powder you particularly like)

  • 5 cloves, milled in a spice grinder or crushed w/ a mortar and pestle
  • 1/2 tsp cumin seeds, milled or crushed
  • 1/2 tsp coriander seeds, milled or crushed
  • 1 bay leaf (removed before filling)
  • 1/2 tsp. freshly ground black pepper
  • 1/4 tsp. cinnamon
Note: Where using whole spices, lightly toast in a hot skillet before grinding, to release their oils.

**Paneer:

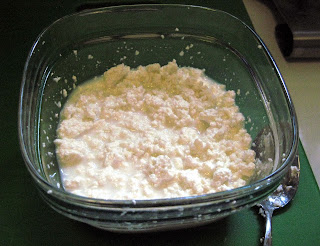
The method for paneer is very similar to making goat cheese, going one step further. Once the cheese is made, it's pressed, like you would press tofu.
  • 1/2 gallon milk (I used 1%, but you could use anything from full fat to nonfat)
  • 1 tsp. citric acid powder (you could use approx. 1/4c lemon or lime juice, adding more if necessary to break the curds from whey)
  • 3 quart sauce pan/pot (nonreactive)
  • Candy thermometer or probe thermometer with clip
  • a clean tea towel or butter muslin
  • strainer
  • something to use as a weight to press cheese (I used a small canister, similar in size to the strainer)
1. Pour milk into the pot and slowly bring up to 190 F, stirring occasionally to ensure the milk isn't scalding on the bottom of the pot.

2. Add citric acid (or lemon/lime) and wait a few seconds to curdle. This will be fine curds (like goat cheese). If you don't see curds after a minute, add a small amount more of acid (1/8 tsp. powder or 1 tsp. juice).
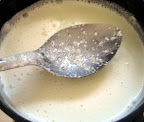
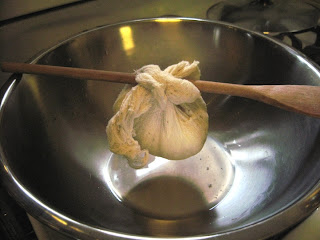
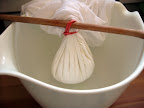
3. Strain in strainer or colander lined with tea towel or butter muslin, gather the muslin and tie to a wooden spoon to drain for approx. 30 minutes.
4. Cover with the other half of the towel and place a weight on top and press for 30-60 minutes.
5. Remove the weight, place in a covered container and refrigerate until use.

Friday, July 13, 2012

Homemade Goat Cheese

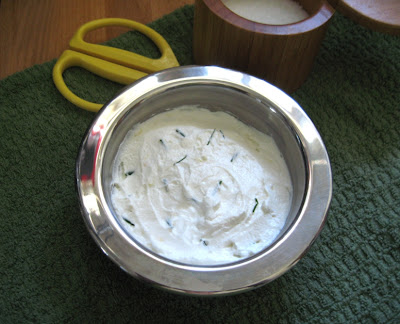
As soon as we got beets in our CSA box last week, I knew I needed to make goat cheese to go with them. It's extremely easy and yields a lusciously creamy dish of heaven. This is a quick method-- no rennet or cultures required. You likely have all the equipment you need right in your kitchen and goat milk is pretty easy to find in most grocery stores.

It will stay soft and spreadable for a couple of days. If you don't plan to use in the first day or so, you may wish to form in a mold for presentation. If you don't have a mold, you can line a small bowl with cheese cloth to form.

Goat Cheese (Chevre)
Ingredients:
  • 1 qt. Goat milk
  • 1/4 c Fresh lemon juice (you could substitute 1/2 tsp. citric acid mixed with 1/4 c water)
  • Cheese salt (any salt will do, as long is it's not iodized and doesn't contain anti-caking agents)
  • Fresh herbs (optional- I used lemon zest and chives)
Equipment needed:
  • 2 -quart sauce pan (non-reactive)
  • Candy thermometer (or a probe thermometer with clip)
  • Slotted spoon for stirring
  • Butter muslin or a clean cotton tea towel (my preference)
  • Large mesh strainer
  • Deep bowl for draining
  • Wooden spoon for draining
  • Cheese mold (optional- in place of the final draining)
Directions:
  1. Pour milk into pan and clip thermometer in place, making sure not to touch the bottom with the thermometer
  2. Slowly bring up to 180F over medium-low heat, stirring occasionally (not continuously)
  3. Add lemon juice or citric acid solution and give a stir
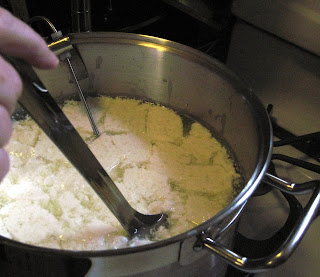
  4. Wait for very small curds to form, 1-5 minutes. It will look more like broken milk rather than large clumps (which is why you need very fine cloth to strain). If you put a spoon in and see little dots of milk, rather than smooth liquid, it's ready.
  5. Slowly pour into a strainer lined with muslin/tea towel over a deep bowl
  6. Once the water has strained for the most part, pour the whey from the bowl, pull up corners of cloth and tie onto a wooden spoon over the large bowl again to drain (If using a full-size tea towel, use a rubber band or large clip to fasten to spoon)
  7. Let drain for 1-2 hours
  8. Stir in salt and any herbs (Tip: kitchen scissors make cutting thin herbs like chives a breeze- no cutting board required). Mold, if desired, and refrigerate.

Friday, June 29, 2012

DIY Greek Yogurt

If you've known me for more than a minute, you probably know I use yogurt like crazy. Specifically, plain Greek-style yogurt. I substitute it for sour cream and mayo, I use it in baking and often make a snack out of it, with a little fruit. I remember the days before it got trendy and you could pick it up pretty cheaply, if you could find it, just because it wasn't very popular. Now that it's become one of the "it" foods, it's nice that it's easily found (even more than one brand!), but the prices have climbed, especially if you find yourself living way too far from the nearest Trader Joe's.

I'll let you in on a little secret... it's the same stuff as the tub of plain ol' plain yogurt a few inches away at about 1/3 the cost. The difference is that it's strained, making it more concentrated and creamy (thus, higher in protein and other nutrients, by measure). It is very easy to do this at home. Yes, you will use a little volume due to the lower moisture content, but not 2/3.

For those of you who make your own yogurt, you can use this method to "Greekify" it, as well.

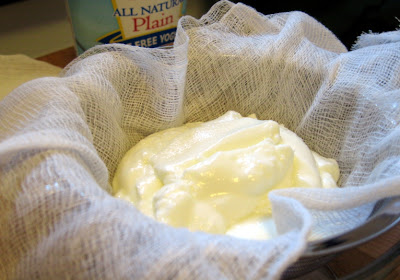
Tools: Strainer, cheesecloth, butter muslin or a clean tea towel (If using cheesecloth, you'll need to double up so that it's fine enough)
Ingredient: plain yogurt (I use nonfat, but use what you prefer)

Line the strainer with cheesecloth, add yogurt and place in a bowl to catch the extra whey.


Let strain in the refrigerator for 1-2 hours, or until it reaches desired consistency (if you strain it long enough, you actually get soft yogurt cheese, which is also tasty). It should be about the texture of thick sour cream.

That's it! See? Told you it was easy.

Saturday, June 9, 2012

It IS Easy Being Cheesy!

What do you do when you get a giant bunch of spinach in your CSA box? You make homemade cheese for spinach lasagna, of course!


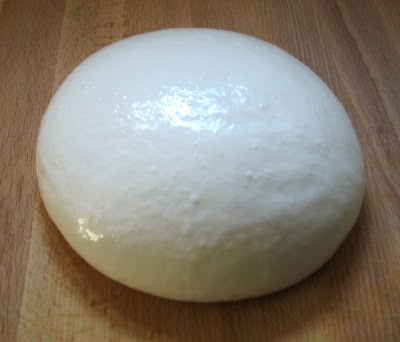
 Making mozzarella is really easy. Once you're done, the whey makes ricotta simple, as well. After you make these two cheeses once, you may never buy it again!

The only things you may not find in your regular super market are the citric acid and rennet (I use liquid vegetable rennet). They are both available online (Amazon has it, as do cheese-making suppliers).
NOTE: If using vegetable rennet, use half as much as animal rennet.

I use this method for mozzarella. It is quick and yields a tasty cheese. I use lowfat milk, rather than whole. The curd can look a little less solid, but will still set up just as well.


Once you have drained the cheese from the whey, ricotta is just as quick and simple. You only have about a 30 minute window to use the whey, though, so it is good to work quickly (or have someone help). If the whey sits too long, it loses the proper enzymes and acidity needed for the ricotta. Pouring the whey back that is strained during the final steps of the mozzarella can help cool it down a bit.

Making ricotta from mozzarella whey:

1. Let the whey cool down to below 105 F (a cool water bath will help the whey cool more quickly).

2. Stir in 1/2 gallon of cool milk.

3. Bring up to 105 F, then move off the heat and cover. Let sit for 15 minutes.

4. Drain the cheese through a colander lined with fine cheese cloth (alternately, use several layers of regular cheese cloth and a fine mesh strainer).

5. Tie the cheese cloth to a wooden spoon and allow to drain for approx. 15 minutes


6. Remove from cheesecloth into a bowl and break into small curds by hand. Add salt and milk to taste (optional). If you don't have cheese salt, you can use either sea salt or kosher salt. You just want to ensure that it is not iodized.


The salt will help preserve the cheese a bit, in addition to adding flavor. You could easily add herbs at the same time you add the salt and milk. If the curds are too big or you want a smoother/silkier texture, along the lines of some commercial ricotta, you can easily run this in the food processor. I did that for the lasagna to get it to the right texture. Drizzle a little milk at a time while pulsing to get the right texture for you.

If you want to reserve the whey (animals and rose gardens love it), just use a large pot to capture it as you strain the ricotta.