Showing posts with label healthier adaptation. Show all posts

Monday, August 27, 2012

Moussaka Makeover

Today was the first day of classes for the new semester. Oy, I have a funky schedule! Part of that, though, allows me to get in some dedicated study time and sneak in some time for a few other activities in which I'm involved.

As part of my plan to be prepared for lunches, this big pan of moussaka left us plenty of leftovers. While I type this, I already have a serving packed in my lunch container with a side of fresh red pepper strips and a handful of dates for a sweet treat.

This rings in at about 330 calories per entree serving, which is 1/6 of a 9x13 pan. Amazing what can happen without oodles of butter, white flour and whole milk.

I love, love, love moussaka. It's not something I make often, mostly because of the rich, creamy bechamel. Of course, that lush topping has always been one of my favorite parts of the dish. When we found some more of those amazing, heirloom eggplants at the farmer's market and already had some local, organic lamb in the freezer, I knew moussaka had to happen. I just had to figure out a lighter approach.  The solution should have been the most obvious thing around... plain ol' Greek yogurt! Yes, my favorite standby comes to my rescue once again. How this hasn't occurred to me in the last 10 years of using yogurt for pretty much everything is beyond me, but there you have it. Maybe our knives are sharper than I am (they are sharp). After some research, it turns out that the Serbians have been using yogurt the whole time. Clearly, they know what's what.

Lighter Moussaka (6 entrée portions)
  • 4 medium potatoes (I prefer waxy varieties, such as red potatoes, especially since I leave the skin on)
  • 1 large eggplant, large summer squash, or any mixture of the two
  • 1 Tbl. olive oil
  • 1 large onion, chopped
  • 1 lb. ground lamb (or beef, but lamb is so much tastier!)
  • 1 22 oz. can tomatoes w/ juice or 2 c. chopped fresh tomatoes
  • 1/2 c. red wine (optional)
  • 1 Tbl. fresh, chopped parsley (or 1 tsp. dry)
  • 1 Tbl. fresh, chopped oregano (or 1 tsp. dry)
  • 1 tsp. cinnamon
  • 1 tsp. allspice (fresh ground, if available)
  • 1 c. nonfat Greek yogurt
  • 1 egg (optional)
  • salt & pepper, to taste
  • Olive oil mister or cooking spray
  • 1/4 c. finely grated parmesan cheese
Scrub potatoes with a vegetable brush to remove dirt, paying particular attention to the eyes and any other little divots. Place in a small pot filled cool water and bring to a boil. Add approx. 1 tsp. of salt to the water and simmer for approx. 20 minutes, until just able to pierce with a fork. Drain and let cool. Once cooled, cut into approx. 1/4" slices.

If using squash, slice it about 1/4" thick and set aside. Trim bottom and top of eggplant. Lay eggplant slices onto a rack over a pan to catch the juices and salt both sides liberally. Let drain approx. 30 minutes, turning once halfway through.
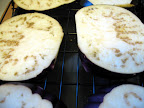
Once finished draining, you will notice some moisture has still pooled on the eggplant. Rinse and dry in a clean towel, gently pressing the moisture out. This helps eliminate bitterness and a mushy texture.

While the eggplant is draining, add olive oil to a hot skillet, followed by the onion at the first wisp of smoke. Sautée onion until lightly caramelized and add lamb, breaking apart with a wooden spoon. Add 1 tsp. of salt. and a grind or two of fresh pepper. Cook until the lamb is browned, then drain off the fat into a fat separator and set aside for a few moments to separate. If you don't have a fat separator, pour into a shallow bowl for about 15 minutes until the fat floats to the top and hardens. Skim the fat and pour the juices back into the pan. Add tomatoes, wine, herbs, cinnamon and allspice. Let simmer for 15-20 minutes until tomatoes are softened and the liquid has reduced by approx. 1/3. Adjust seasoning to taste after reduced.


In a separate bowl, whisk together yogurt and egg (the egg is optional, but gives it more structure).

In a 9x13 baking dish sprayed with olive oil or cooking spray, line the bottom of the pan with potato slices and add half of the meat and tomato mixture on top. Add a layer of eggplant and/or summer squash (We had a couple small yellow squash I added in between eggplant slices). Add the remaining meat and tomato mixture. Pour yogurt mixture on top, spreading as evenly as possible, and sprinkle with parmesan cheese.


Bake at 375 F for approx. 35 minutes, or until bubbly and the cheese is golden brown.

Wednesday, August 1, 2012

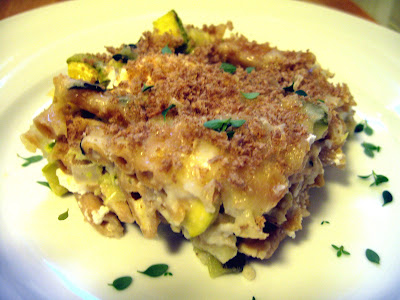
Mac and Cheese Makeover


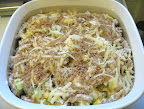
I love macaroni and cheese. I'm not referring to the boxed stuff with powdered "cheese food", but the wonderful layers of pasta baked in a creamy, dairy wonderland. It can be heavy, rich and filled with overly-refined flour from the roux and pasta. It's tasty, but since I have a tough time eating a single bite and walking away, I've made a few adaptations over the years that point it in a healthier direction.

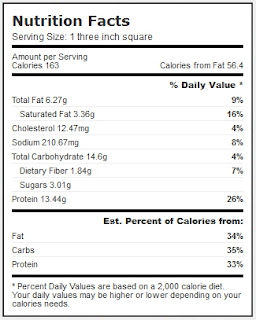
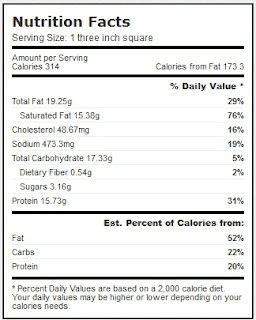
In addition to whole grain pasta and lighter cheeses, I also add plenty of vegetables to further lighten the dish. It's still not exactly what I'd necessarily consider a health food, but definitely a lighter version of the original. The fat that remains in the dish helps with satiety, but also contains far less saturated fat and cholesterol. I've included the nutrition information below, as compared to the same serving size of more traditional baked mac & cheese. Keep in mind that this is for a 3" square side dish serving. If you raise it to a main dish portion, the differences in fat and calories of the more traditional method are especially scary to me.


Mac & cheese made over (left) vs. a more traditional mac & cheese (right)

Rather than adding the goat cheese to the cheese sauce, dotting with the cheese in layers gives you wonderful bursts of flavor throughout the dish. For the vegetables I used a mixture of zucchini and yellow squash, but you could use the same amount of other vegetables, such as broccoli or turnip. Layering in some spinach would add even more nutritional boost.

Goat Cheese and Summer Squash Macaroni and Cheese (yields 9 side dish or 4 main course servings)
  • 8 oz. (dry) whole grain penne or elbow macaroni
  • 1 1/2 c. nonfat or low fat Greek yogurt
  • 6 oz. reduced fat cheddar, grated and divided (I use a sharp white cheddar made from 1% milk)
  • approx. 3 Tbl. liquid (milk of choice, vegetable stock or whey from making goat cheese-- the whey is especially flavorful)
  • 2 tsp. olive oil
  • 1 onion, diced
  • 1 clove garlic, crushed or finely minced
  • 2 c. summer squash, chopped (approx. 1 large or 3 medium)
  • 1 tsp. dry mustard
  • 1 pinch cayenne (optional)
  • salt & pepper to taste
  • 2 sprigs thyme, leaves removed from stem (optional)
  • 4 oz. goat cheese
  • 1/3 c. whole wheat panko bread crumbs
1) Cook pasta according to package directions, reducing the time by approx. 3 minutes
2) In a large, hot skillet, add olive oil & sautee onions until just glossy, then add garlic and squash. Cook until the squash is just softened and set aside
3) In a medium saucepan, heat yogurt over a *low flame & add 3/4 of the cheddar, whisking until the cheese is melted and incorporated. Add mustard. Use liquid to thin until you have a smooth cheese sauce that still coats the back of a spoon (and the pasta).

4) Stir pasta and zucchini into sauce to coat and season with thyme, cayenne, salt & pepper
5) Pour half of the pasta mixture into a greased 9x9 baking pan & dot first layer with half of the goat cheese
6) Add the rest of the pasta and dot with remaining goat cheese
7) Sprinkle the rest of the cheddar on top
8) Top with panko

9) Bake in a 375 F oven for approx. 20 minutes or until cheese on top is melted and panko is well toasted

Let rest for 15-20 minutes before serving.

* A low flame is especially important if you're using nonfat yogurt, as it easily breaks over high heat.

Tuesday, July 31, 2012

Upside Down Fresh Blueberry Pie

The last time I had dinner at my in-laws', my mother-in-law made a spectacular fresh blueberry pie. It's a pie containing a mix of half cooked and half fresh blueberries in a pre-baked pie shell. I abstained from a full serving, but did swipe a bite of my husband's and it was delicious! So, when we got a container of blueberries as a part of a recent CSA box, I knew I had to replicate it with my own spin.

I wanted a lower crust-to-fruit ratio, but I wanted it to taste like pie, so I added a small crust on top, baked separately, cookie-style. I also wanted to cut down on the added sugar. Whether to add sweetener or not is based on personal taste and sweetness of the berries. Careful with the stevia- it's far sweeter than sugar, so it's very easy to overdo it. Since it's served cobbler style, the pie filling can be slightly looser than when it has to hold up to slicing.


Upside Down Fresh Blueberry Pie
  • 1/4 single-crust recipe for your favorite pie dough (I used an extra virgin coconut oil crust w/ whole wheat pastry flour, lightly sweetened with stevia)
  • 5 c. blueberries, divided
  • 2 tsp. corn starch or arrowroot
  • 1 tsp. EV coconut oil (or Earth Balance stick)
  • 2 Tbl. lemon juice
  • 1 pinch salt
  • 1 pinch stevia (optional)
Roll pastry and divide into 4 (I used a cookie cutter to shape). Bake at 400 F on a sheet pan until golden, approx. 5 minutes.

Divide 2 c. berries among 4 small greased ramekins (I use an oil mister to coat) and set aside. 

Toss remaining blueberries with cornstarch/arrowroot. Heat oil in a medium saucepan over medium-low heat and add blueberries and lemon juice. Stir frequently. The berries will open and begin to break down. Cook over low heat until juices have thickened and reduced by approx. half. Add salt and stevia, if desired. Let cool for 5-10 minutes. Spoon 1/4 of mixture to each prepared ramekin. Stir gently, if necessary, to incorporate cooked berries with the fresh berries. Top with pre-baked pastry crust.

Tuesday, July 17, 2012

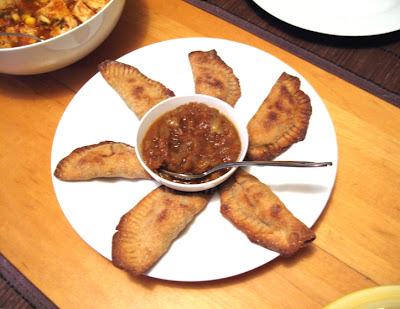
Baked Root Vegetable Samosas With Grapefruit Chutney

Rather than frying the samosas, I bake them. This dough still yields a nice balance of crispy and chewey crust.

The filling falls in the category of "I have a bunch of veggies to use and these sound good". I sometimes do the more traditional potato & peas filling, adding carrot for a bit of sweetness. Since I don't really care for either potatoes or peas (unless they're straight from the pod, and those went in the rice), however, I often seek out different fillings. Since we had turnips that needed to be used, I figured they were a great substitute for potato. I left in my usual standby of carrot. One of the beauties of these little pastries is that the filling can be pretty much whatever you want. You could even do a dessert version with fruit!

You should serve with some sort of complementing sauce(s). This time I served them with some grapefruit chutney (recipe below), but there are endless sauces you can use. One of my favorites is seasoning pumpkin butter with warm spices (cardomom, cumin, etc) and apple cider vinegar.

The rolling and assembly of the samosas was courtesy of my husband and favorite sous chef :-)

Samosas - Yields approx. 1 dozen samosas.

Pastry: (adapted from Mollie Katzen's "Moosewood")
  • 2 c whole wheat pastry flour, plus more for kneeding
  • 1 c plain yogurt (If greek, add 1 Tbl. of water)
  • 1 large pinch of salt
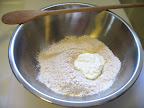
Mix all ingredients in a bowl. Knead for a few minutes (between 3-5 min.). You don't want to over work the dough, but you do want to develop enough gluten so that it's strong enough to hold the filling. Once this is done, cover with a damp towel and set aside to rest while you make the filling (if longer than an hour, put it in a baggie and into the fridge- this can be done even a few days ahead).


Filling: (I vary the filling frequently. You need approx. 3 c of chopped raw vegetables-- more if they lose a lot of moisture while cooking)
  • 3 small pink turnips (one large turnip would do), skin-on, scrubbed and diced
  • 2 carrots, peeled and diced
  • 1 Tbl. olive oil
  • 1 tsp. mustard seeds
  • 1 tsp. cumin seeds, crushed
  • salt, to taste
Keep in mind that you want to have your vegetables all cooked to your desired doneness at the same time. It's okay to start cooking the hardier vegetables for a few minutes and then add those that will be done more quickly. I actually like that in this particular combination the carrots take longer than the turnips. I started them at the same time on purpose, so that the turnips with be nice and soft while the carrots were tender, but still had some body to them. The combination of textures were great!

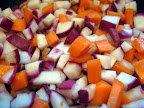
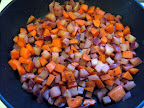
Heat the oil in a hot skillet and add the vegetables, in stages, if necessary. Add a pinch of salt, the mustard seeds. As the vegetables soften, season to taste.

Filling, before & after

Let the filling cool before assembling.

Assembly: (at this point, preheat your oven to 425 F)

  • Divide dough into approx. 1" balls
  • Flour your workspace and roll into approx. 5" circles
  • Place approx. 1 1/2 Tbl. of filling (better to slightly under-fill than over-fill)
  • Fold in half around the filling and crimp edges with a fork, along the semicircle
Baking:
  • Place on an oiled baking sheet (I used an olive oil mister)
  • If you have a mister with olive oil, spray the tops of the pastries, as well
  • Bake for 15 minutes
  • Turn over and reduce oven to 375 F
  • Bake another 7-10 minutes, until brown
Grapefruit chutney
  • 1 large ruby red grapefruit
  • 1/2 onion (I used a small, whole spring onion)
  • 2 Tbl. apple cider vinegar
  • 1 Tbl. brown sugar, or equivalent (I used a brown xylitol/stevia blend)
  • 1 tsp. cardomom
  • 1/2 tsp. cumin
  •  a few grinds of black pepper
  • 1 pinch cayenne (optional)
  • salt, to taste
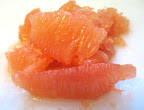
Using a sharp knife, peel the grapefruit, taking care to remove and discard all of the bitter white pith. Section the grapefruit out of its membrane and cut into chunks (they will break down as they cook), removing any seeds. If you are a whole-foods eater like me, finely mince the membrane and add with the fruit. It does add a small amount of bitterness, but the rest of the flavors mellow that component. If you have a cutting board with a little reservoir, use it to capture any juices and pour them into the pot, as well.


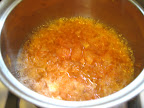
Saute onion in a small amount of water to soften, then add grapefruit (or, if you're like me, do the onions separately because you initially forgot them until the first taste, haha). As it's about half way softened, add vinegar and approx. 1/2 c. water. Let simmer slowly until reduced approximately by half (approx 30 minutes), stirring every 5-10 minutes. Add seasonings slowly and adjust where necessary. It should be like a loose jam. Let it cool to room temp before using.

Friday, July 13, 2012

Brown Rice Jambalaya

I love jambalaya. It makes me recall wonderful memories of going to the New Orleans Jazz Festival several years ago, with (allegedly) free-flowing hurricanes (the cocktail kind) and amazing food at every turn. Unfortunately, unless I'm actually there and in full-on vacation eating mode, I don't often eat the more authentic stuff. This is just enough to satisfy me and bring me back to that culinarily decadent town.

Brown Rice Jambalaya


Ingredients:
  • 1 Tbl. vegetable oil
  • 1 c. brown rice (dry or sprouted), par-cooked (I cook it about half way in a rice cooker, but stove top would also work)
  • 1-2 links of andouille sausage, sliced, sauteed or baked and put aside (I used homemade veggie andouille baked into coins, but sliced commercial chicken or veggie andouille would work)
  • 1 onion, chopped (We have a surplus of green onion, so used that instead)
  • 2 ribs celery, chopped
  • 1/2 large red bell pepper (green would also work- I don't happen to like them)
  • 1 bay leaf
  • 2 small cloves garlic, minced (1 clove, if large)
  • 2 c *chopped vegetables
  • 2 medium tomatoes, chopped (or approx 1 c. canned/boxed, drained)
  • 1/2 c tomato sauce
  • 1 Tbl. concentrated tomato paste
  • 1 Tbl. anchovy paste (optional)
  • 1 c. stock (I made seafood stock from the shrimp shells, but veggie or chicken would work)
  • 1 lb. 21/25 shrimp/prawns, deveined and shelled
  • 2 Tbl. **Spice mix (I used the spice mix leftover from making the andouille), toasted briefly in a hot pan to release their oils
  • Adjust seasonings, to taste
Things move quickly after the first few steps, so it's best to have everything prepped and easily within reach (the shrimp should stay in the fridge, but have it easily accessible).

1. Heat a 3 or 4 qt. pan over med. high heat and add oil.
2. Saute bell pepper and onion until glossy.
3. Add garlic, remaining vegetables and a pinch of salt then sautee for approx. 10 minutes, just to lightly soften
4. Add par-cooked rice
5. Slowly add tomato sauce & stock, followed by 1 Tbl. of the spice mix and give everything a couple of stirs.
6. Reduce to simmer for approx. 15-20 minutes, or until rice is tender (not mushy) and most of the liquid is incorporated.
7. Add shrimp and sauteed sausage. Stir slowly and cook until shrimp are just pink (careful- they cook quickly)- about 3-5 minutes and remove from heat.
8. Season to taste with remaining spice mix and salt

I garnished with some fresh parsley to tie into the freshness of the veggies and give it a little color.

*For this batch, I used vegetables I had available-- green kohlrabi, pink turnip & carrot. Be sure to cut longer-cooking vegetables, such as carrot, into a smaller dice. If cooking times vary, add them in stages to cook evenly. Warning: Green veggies will discolor because of the acid in tomatoes.
**Spice mix: (Measurements are approximate, adapted from Emeril Legasse's andouille recipe)


This was the leftover dry mix from making the sausage, but can be used anywhere you want an extra kick-- pasta, eggs, fish, etc. The more spices you have whole to grind fresh, the better. Use a mortar and pestle or a spice grinder to grind separately, then combine.
  • 4 Tbl. smoked paprika
  • 2 Tbl. garlic powder
  • 2 Tbl. cayenne pepper
  • 1 Tbl. coursely ground black pepper
  • 1 Tbl. onion powder
  • 1 Tbl. dried oregano
  • 1 Tbl. dried thyme
  • 2 tsp. kosher salt
  • 1 tsp. file powder ("fee-lay": this may be labeled as "Gumbo File" or "File Gumbo"- If you absolutely can't find it, you can leave it out or substitute ground, dry sage)
  • 1 tsp. crushed red pepper
  • 1 tsp. ground cumin
  • 1/2 tsp. celery seed

Friday, June 29, 2012

DIY Greek Yogurt

If you've known me for more than a minute, you probably know I use yogurt like crazy. Specifically, plain Greek-style yogurt. I substitute it for sour cream and mayo, I use it in baking and often make a snack out of it, with a little fruit. I remember the days before it got trendy and you could pick it up pretty cheaply, if you could find it, just because it wasn't very popular. Now that it's become one of the "it" foods, it's nice that it's easily found (even more than one brand!), but the prices have climbed, especially if you find yourself living way too far from the nearest Trader Joe's.

I'll let you in on a little secret... it's the same stuff as the tub of plain ol' plain yogurt a few inches away at about 1/3 the cost. The difference is that it's strained, making it more concentrated and creamy (thus, higher in protein and other nutrients, by measure). It is very easy to do this at home. Yes, you will use a little volume due to the lower moisture content, but not 2/3.

For those of you who make your own yogurt, you can use this method to "Greekify" it, as well.

Tools: Strainer, cheesecloth, butter muslin or a clean tea towel (If using cheesecloth, you'll need to double up so that it's fine enough)
Ingredient: plain yogurt (I use nonfat, but use what you prefer)

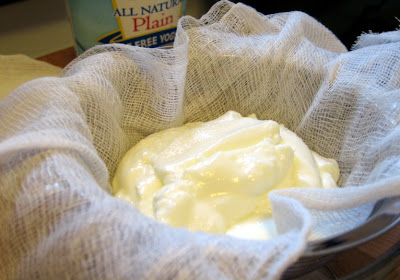
Line the strainer with cheesecloth, add yogurt and place in a bowl to catch the extra whey.


Let strain in the refrigerator for 1-2 hours, or until it reaches desired consistency (if you strain it long enough, you actually get soft yogurt cheese, which is also tasty). It should be about the texture of thick sour cream.

That's it! See? Told you it was easy.

Monday, June 11, 2012

Lasagna

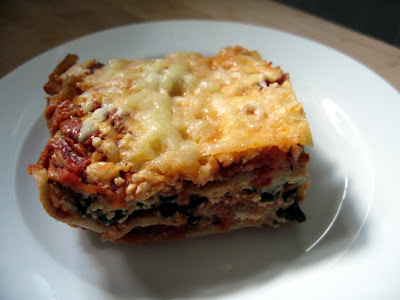
If you wonder whether homemade cheese is worth it, I assure you, it is! We used part of this batch of mozzarella and ricotta for lasagna.


This particular lasagna was a celebration of the fresh cheese we made the other day and the fresh ingredients from the CSA box. It was about half the calories and contains more fiber than your typical meaty, full-fat, white pasta dish, but tasted just as creamy and indulgent as its counterpart, without being greasy.

I made the sauce the night before, so we could quickly assemble the next morning before leaving for the day. I used half strained tomatoes (through the food mill) and half whole tomatoes, broken apart by hand, because I wanted it chunky. I added juicy, thick slices of sauteed mushrooms (sauteed until just soft to retain their moisture), grated carrot (from the CSA box) and plenty of love (among other things).

After running the ricotta through the food processor, it was a little on the wet side (we could have used less milk), so I added an egg to give it structure, along with quickly blanched spinach (chopped spinach into simmering water for literally 1-2 seconds, then strained and immediately into an ice bath) squeezed of its moisture (you can add this rich, green water you squeeze from the spinach into the sauce to retain it) and some parmesan.

The noodles were whole wheat lasagna. If making fresh pasta, you can easily use whole sheets, rather than cutting to noodles.
NOTE: If using dry pasta, par boil to about half of the time listed on the package. This will absorb some extra moisture. If using fresh pasta, make sure to simmer the sauce for a few minutes to reduce it to a thicker consistency, since it won't absorb as much moisture.

Starting with sauce on the bottom (so it doesn't stick to the pan), I layered everything mentioned above, in addition to crumbled veggie Italian sausage (Fieldroast is excellent, if you don't make your own). You could easily use extra veggies (watch the moisture!), meat, whatever you like. You could also omit this layer. I topped with a final layer of pasta, sauce and plenty of mozzarella.

I baked covered w/ foil @ 375F for about 45 minutes, removed the cover and added a little more mozzarella until golden and bubbly. It was about 160F when I took the cover off. An instant-read thermometer should reach 180F (if up to 190F, don't panic) to ensure it's heated through, at which point you can remove it. Let rest for at least 15 minutes to allow everything to settle and for the moisture to balance out. If you've made it ahead, as we did, you should take it out of the fridge a good half hour before putting in the oven.

I garnished with chopped fresh basil (not pictured) to add to its freshness and served with a warm, freshly baked multigrain baguette and a salad with lettuce, arugula (both from the CSA box) and nectarines in a tangy feta, black pepper and yogurt dressing.

Bon appetit!

Friday, May 25, 2012

Zucchini Fritters

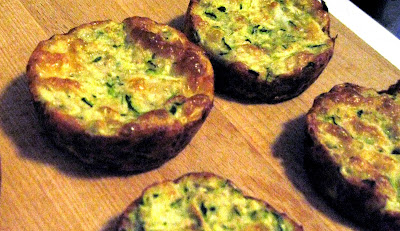
We're going away for a couple of days. Since we're leaving, there was a zucchini in my fridge I wanted to use up. I decided on simple baked zucchini fritters. Rather than baking them in patties, I've found that muffin tins allow for even baking and a lighter texture.

Ingredients:
1 medium-large zucchini
1/2 of an onion
approx 5 tsp whole wheat pastry flour (pretty much any flour would work here)
1/2 tsp baking powder
1 egg
2 oz. light cheddar cheese, grated
salt
pepper
(you could easily add fresh herbs, to taste)

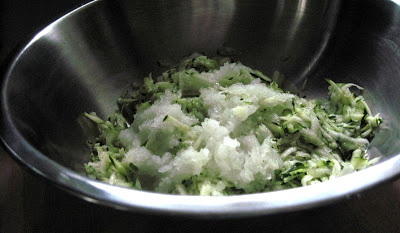
First, I grated the zucchini and onion into a bowl.


Next, I poured the onion/zucchini mixture into a colander and pressed out as much moisture as I could. I sprinkled it with a pinch of salt and gave it a mix. I let it drain for about 20 minutes or so, letting the salt pull out more moisture. When ready, I pressed it again and put it into a medium mixing bowl.

I added the flour, baking powder, egg, cheese, and freshly ground pepper (to taste) and mixed with a spoon until the flour is moist.

I used a medium cookie scoop to put the mixture into an oiled muffin tin and baked at 400F for approximately 20 minutes, until nicely browned and solid in the center. This yielded 9 fritters. If you have a larger zucchini (or using 2 medium ones), add another teaspoon or so of flour and up the baking powder to a full teaspoon.

They were nice and light, while mildly crispy. I usually make these with parmesan, but I liked the texture that the cheddar added. They went well with scrambled eggs for a simple supper :-)


Saturday, May 5, 2012

Cinco de Mayo Fiesta

Hola chicos,

Three final exams down, two to go. Whew! Yes, I actually had a final on a Saturday. A SATURDAY!

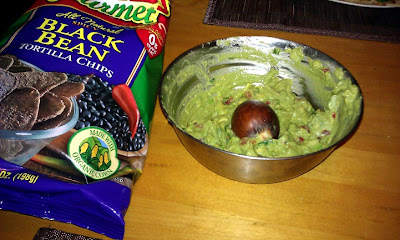
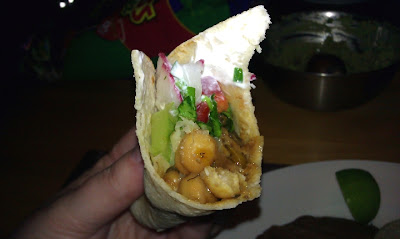
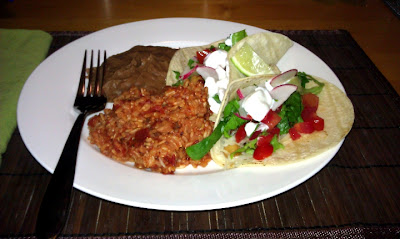
In honor of Cinco de Mayo, I figured we were due for taco night. The offerings of the evening included fresh guacamole with black bean chips, tacos de garbanzos y champiñones (chickpea & mushroom tacos- my Spanish professors would be so proud), spicy refried beans and Mexican brown rice.

The guacamole was my husband's doing, loosely based on Rick Bayless' recipe from "Authentic Mexican". It was nice and bright and fresh! The object in the middle of the guac is the avocado pit to help keep it fresh (it helps from oxygen getting to the middle part of the guac while we worked our way inward). We ate it with spicy black bean chips from Guiltless Gourmet. Some of their chips are a bit cardboardy, but these were excellent. We've had them in the pantry forever, so was good to finally give them a chance to shine.


The tacos were messy, but worth it!


First, the taco filling:

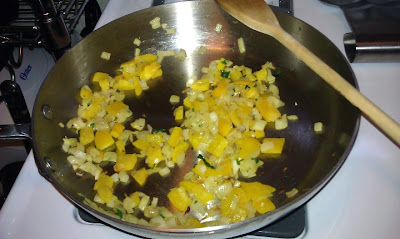
I started with a basic miripoix of onion, garlic and yellow pepper (red, orange, yellow- I usually use one of them). I added the peppers when the onions were not quite translucent.


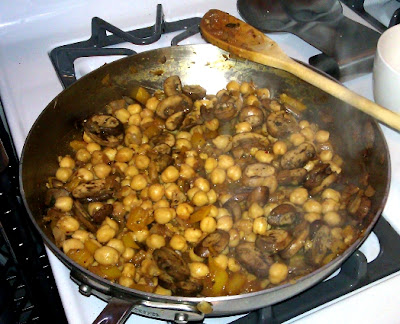
I then added the mushrooms. As things got dry, before the mushrooms released much moisture, I added the juice of half a lemon and a small bit of vegetable broth to deglaze the pan and keep things moving. Once the mushrooms started to break down and create a nice sauce, I added the garbanzos (soaked & precooked or canned are both fine- watch the salt with canned). I mashed a few of the garbanzos to aid in the sauce. I seasoned it (to taste) with salt, pepper, oregano, cumin, cinnamon and paprika. Since I didn't find any chiles at the store that I liked/looked good, I added a bit of red pepper flake for heat. A chopped chili of your choosing would be fine, too. Personally, for tacos, I pick up whatever looks freshest/sounds good at the time. Or, I go with whatever is already in my fridge/pantry. The "smoke" you see is actually steam:


The tacos were made with soft, fresh corn tortillas (very easy to make, but also available in most grocery stores). Heat them up over fire, if you have a gas stove. Otherwise, a skillet or griddle is fine. Heck, if you want to, toss them in the microwave. I won't tell. The main objective is to make them pliable. Of course, if you don't like corn, flour will do.

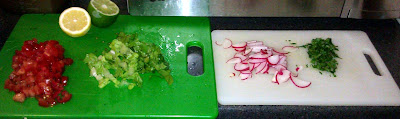
We topped off the filling with light white cheddar, lettuce, chopped tomato, thinly sliced radishes, fresh parsley (we don't do cilantro), a squeeze of lime and plain Greek yogurt. What makes it for me are the radishes. They remind me of really good Mexican street tacos.


They were served up with spicy refried beans and Mexican brown rice. The rice was easy- I threw in all the ingredients (Pomi chopped tomato, onion, salt, chili blend, cumin, a bay leaf, cinnamon and probably a few other things I'm forgetting) into the rice steamer and set it to cook. Allow for about double the time as it takes on the stove top, with a couple of stirs in between so the rice cooks evenly.


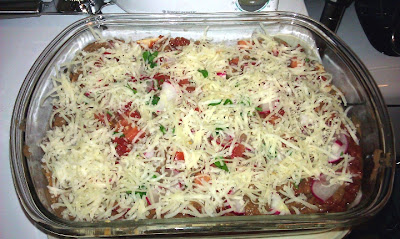
The beauty of this meal, beyond the taste, is that it all went really well together. So, instead of packing up the leftover components individually, I layered them all (including some tortillas in the middle) in a casserole dish for later in the week. It will be easy to pop this in the oven to heat through when needed. It's healthy and perfect for when I'm in the weeds of exams and won't want to cook.


¡Nos vemos!

Friday, May 4, 2012

Pizza Night!

Hello, my long lost friends! School has kept me really preoccupied the past several months. I'm happy I'll soon have a break for a couple of months.

First off, I have a new twitter feed! I realized that when I don't have much time to post a real entry, I do have time to tweet. It's not always food-based, but it's likely to be the subject of most tweets. I can be found here: https://twitter.com/eatherselfalive

Now that I'm ramping down for the semester, however (finals began today), I have been getting reacquainted with my kitchen. Since tonight is traditionally "pizza night" in our house, I figured I'd do a healthy spin on it. Since the weather is warmer and we're getting those awesome spring veggies, I'm loving cooking with as many veggies as possible.

I've heard great things about cauliflower crust, so was curious. I'm not gluten free, but welcome any healthy addition to my diet, if it's tasty. I figure I'd do a side-by-side comparison with homemade whole wheat flat bread.

Cauliflower Crust

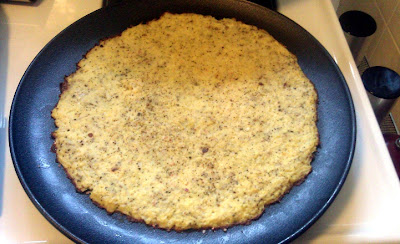
The cauliflower crust is easy: a cup of chopped cauliflower to 1 egg (if you don't do egg, I imagine flax and water would be a suitable binder). I added Italian herbs and crushed red pepper then pressed onto the pan (not too thin). It took about 15 minutes @ 450 (no toppings yet). It could easily be doubled.

This is the cauliflower crust straight from the oven before topping:


Homemade Flat Bread

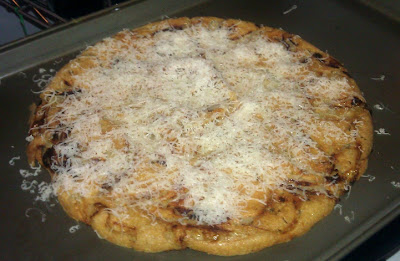
I've made pizzas from a myriad of flat breads (tortillas, lavash, naan), but this one's the easiest to make. It's also quick and whole grain (traditionally it's chickpea flour, but other whole grain flours work well, especially whole wheat and cornmeal). I made the batter (1c whole wheat flour, seasoned w/ salt & approx 1 1/2c water- incorporate slowly until like a thin pancake batter) and heated a cast iron skillet with the oven to 450 degrees (farenheit) and placed some olive oil in the pan w/ thinly-sliced onions sprinkled with thyme. After a couple of minutes, I gave the onions a stir to ensure evenness and poured the batter in the pan to bake for about 30 min.

This is the flat bread out of the oven w/ some grated manchego cheese:


Now for the toppings!

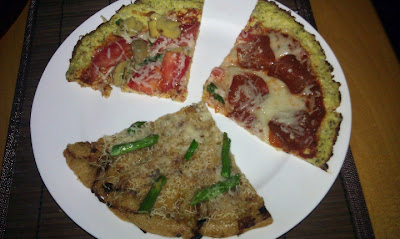
I added tomato sauce and mozzarella to the cauliflower crust and topped half with marinated mushroom, tomatoes and fresh basil. I topped the other half with turkey pepperoni, then put it under a hot broiler for a few minutes (keep an eye on it- it's done when the cheese is melted).


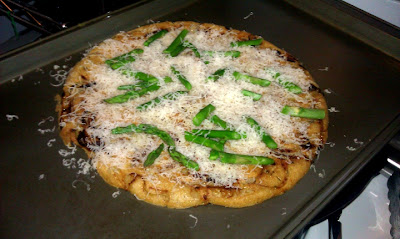
For the flat bread pizza, I left things simple. I blanched some asparagus, chopped it up and placed it on top with the manchego. The caramelized onions and the manchego on their own make for a yummy combo. The asparagus was the icing on the proverbial cake. Once topped, I baked it in a moderate oven for about 7 minutes (again, until the cheese melted). I didn't catch a photo of the finished product (whole), but here it is before it hit the oven again:


The verdict...

It was a tie! I was surprised that my favorite between the two crusts was the cauliflower. It was great with the tomatoes and mushrooms. I also liked the other pizza, mostly because it wasn't traditional. .100% whole wheat overtakes the more traditional pizza toppings, in my opinion. My husband preferred the flat bread, though he also enjoyed the mushroom tomato combo on the cauliflower. The pepperoni didn't mesh very well with the delicate grain-free crust. I think I'll stick to fresh vegetarian toppings for this one.

I should note that these 3 pieces filled me up! Considering two of the slices were on a vegetable-based crust, that's pretty great. Dessert will be some fresh melon :-)

Wednesday, June 29, 2011

Pasta Nachos

In our new little hometown, there are a few restaurants with which we've fallen in love. One of them is Brix Pubaria. While they have some delicious, simple, thin whole wheat pizza, they also have something on the opposite side of healthiness: pasta nachos. They're a luxuriously wonderful stack of toasted wonton wrappers layered with refried beans, ground beef, cheese, pickled jalapeños, and dotted with fresh cilantro cream. While we love them as-is, it's also not the healthiest thing in the world. I decided I'd take a stab at somewhat healthifying this decadent appetizer (and make it a meal).

For a first pass at it, I'd say it was a success!

The wrappers were a white flour indulgence (you can make your own or use store bought), but they're thin and not overdone in comparison to the rest of the ingredients, so not a bad concession. The rest of the ingredients were pretty decently healthy, without any taste compromise.

First, I toasted the wonton wrappers. I gave them a light mist of olive oil on both sides and popped them in the oven for a few minutes to brown. Here's one step I'll slightly modify next time: I'll take them out when they first begin to brown, as they'll brown further when assembled and baked.


I used canned refried beans for convenience (organic, lard-free, vegetarian, in this case-- and not terribly high in sodium). I don't mind canned refried beans, but I don't usually like the texture. They're way too thick. I added a bit of water to them in a skillet and let them simmer to the desired consistency.

Instead of the cilantro cream, I seasoned some nonfat Greek yogurt with chili powder, onion powder and cumin. If you want it extra spicy, you could easily add some cayenne or hot sauce, but the jalapeños were enough heat for us. The yogurt adds a nice extra tang, which worked well. Neither of us is a big cilantro fan, so left that out, but you could add some chopped fresh cilantro if you like it.


Probably the biggest substitute, without consequence, is the meat. There's not much needed, so I used Quorn crumbles, lightly seasoned with garlic, cumin, chili powder, salt and pepper. When on their own, they dried out a bit while baking, though it didn't stand out. I hadn't really thought about the fact that I usually use vegetarian crumbles in some sort of sauce, so of course they got dry! Next time, I'll saute them beforehand in a small bit of stock or broth so they don't dry out. If you don't want to go the veg route, ground beef would also be fine. If I had it on-hand, I might have used it (or shredded beef/chicken/pork).

I used a mix of reduced fat cheddar and regular monterey jack cheese. The cheddar kept the calories down and the jack is nice and melty, especially for the top.

I did 3 layers of wontons with the filling between each layer. It lends itself to a nice melty core, one of the beauties of pasta nachos- the variety of crunch and soft textures. I baked in a moderate oven for about 10 minutes, just until the top was nice and bubbly.

Once out of the oven, I topped with fresh, chopped tomatoes and drizzled with the yogurt sauce.


Definitely a success, with a few learned items for next time. And since we didn't have to save room for pizza, it disappeared pretty quickly with far less guilt than the inspiring dish.

Friday, March 4, 2011

Not Your Grandma's Tuna Casserole

The other day, while planning meals and putting together a grocery list, I got a craving for tuna casserole. I figured I could deconstruct it and make a more "grownup" version.

First, I figured I'd bring out the essential (to me) ingredients: Tuna, mushrooms, egg noodles, a green vegetable (my mother used frozen peas, but I'm not a huge fan), and something salty/crunchy (which, in our family, was always crushed potato chips).

I sauteed thinly sliced garlic in olive oil, keeping a watchful eye so it lightly toasted, but didn't burn. I then added fresh, sliced crimini mushrooms. Once the mushrooms were sauteed, I then added canned, water-packed tuna to the mixture (since I wanted it cooked through, it seemed it'd have been a sin to do that to a good piece of fresh tuna) and plenty of lemon juice and black pepper.

Since there was lemon juice in the mixture, I sauteed fresh green beans separately, to be added in when combining the pasta. (Tip: Acids can cause a loss of color in green vegetables.)

Once the pasta was done, I added it and the green beans to the tuna and mushroom mixture. I gave a splash of milk, to add a slight bit of creaminess, and let the dish absorb it. I didn't want anything too gloopy, a la canned cream of mushroom soup (eew), just a little something. I finished it all by adding whole wheat panko bread crumbs, for the crunch factor. I seasoned each component very lightly with kosher salt and added a little more in the end, to ensure I didn't over-season.

The end result was a good, flavorful, healthful dish. I liked the interaction of the pepper and the mushrooms and the bite of the sauteed green beans, vs. the mushy vegetables that usually come out of the traditional casserole. With minimal cooking, the tuna stayed flaky and held its structure instead of getting mushy. The dish held up well for lunch today, too. P even enjoyed it cold.


Lunch was leftovers from the day before (yay, spaghetti squash) and snacks were a tangelo and seedless red grapes. Do I need to say I had raisin bran again for breakfast? This time I did add banana.

Thursday, March 3, 2011

Vegging Out

When I tested my blood this morning, it was a very wonderful 89. Annnnd we're back. I've also lost about 3 lbs. this week. Oh, yeah.

As spring approaches, I find myself scaling back on meat. I used to do an official 6 months on/6 months off thing, but now I find I naturally crave that cycle. I don't go fully vegetarian- fish is very much part of the picture, I just tend to gravitate more toward veg options. (No, the correlation of the better blood sugar and movement in weight loss isn't lost on me.)

Last night, it was spaghetti squash. After steaming it, I removed the strands and mixed with sliced zucchini, chopped spinach, Italian herbs, garlic, chopped onion, tomato sauce (Pomi strained tomatoes), and garbanzo beans. I made a layer of half the mixture in a baking dish, sprinkled some nonfat feta and added the second layer. We had a little bit of mozzarella cheese on-hand, so I spread what we had on top, along with some parmesan cheese. I gave a few cranks of a pepper mill here and there. I baked the mixture until heated through. It was nice that there was still a slight bite to the fresh veggies.

Here we have a perfectly healthy, low calorie, filling dish:


Mmmm... the best part is that I have leftovers for lunch today.

Breakfast was my latest standard of raisin bran with skim milk. I didn't snack as much as I should have, but I did grab a tangelo in the afternoon. Lunch was scrambled eggs with fresh spinach and halved grape tomatoes.

Monday, February 21, 2011

Falafel

Recently, I was in the mood for falafel. Yes, I could go to one of the zillion places that make incredible falafel (I think there are 6 within a half block of my apartment), but it'd be fried. In an effort to actually consume a healthy meal, I typically just make it myself- baked. For baked falafel, I find it easier to use a mix (usually Casbah or Near East). It yields a dryer falafel [dough? batter?], whereas homemade can be too wet and will steam rather than bake up nice and crispy. I flatten the balls into little patties, give the pan a mist of olive oil before placing them on the baking sheet, and bake at 375 for 15-20 min. before giving the tops another mist of oil and flipping over to bake another 15-20 min.

I also made homemade hummus (nice and garlicky) and served with whole wheat pita, chopped tomato, sliced cucumber, fat free feta cheese (the only fat free cheese I've found so far that actually tastes good) and a side of couscous (infused with veggie broth). Yum!