Showing posts with label how-to. Show all posts

Friday, August 10, 2012

Homemade Greek Yogurt

As much as I use yogurt, it took a while to venture into making it from scratch. Recently, while making cheese, it dawned on me that yogurt can't be that much more difficult. As it turns out, it's even easier. And you don't need anything more than a crock pot. I've hesitated buying a yogurt maker because didn't want a single-purpose appliance in my kitchen, so this was the perfect solution. If you don't have a crock pot, you could also use a heavy duty, non-reactive dutch oven (such as enameled cast iron), with a few tweaks.


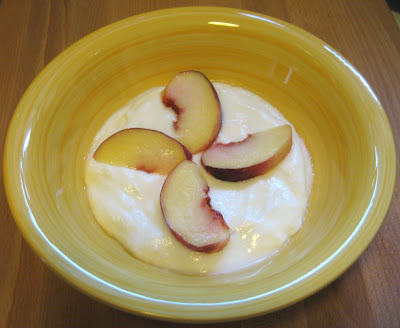
Pictured: yogurt & nectarines. I use Greek yogurt as a healthier substitute for mayo, sour cream, and love it as a snack with a little bit of cinnamon extract and fresh fruit or in a sweet lassi. I've even made cheesecake out of it.

One advantage to homemade yogurt is that you can control the source. Fresh, local, organic milk is easy to find here, but I rarely see local yogurt of the same quality. If you like your yogurt sweetened, you can also control any additives. Making your own can be a money saver, too, especially if you use yogurt as much as we do. A half gallon of milk makes about 5 cups of Greek yogurt. That comes down to about 40 cents a cup for us. A 32 oz. container is about $5 here, so we're spending about 1/3 of that by making a higher quality product ourselves.

You can actually do the entire heat process in a crock pot, but that takes way more time and patience than I'm willing to expend on a weekly basis. I start it on the stove and transfer to a warm crock pot. If you want to do it all in the crock pot, you'll need a little more babysitting to catch it when it's up to temp and then cooled off enough to add the culture. Either way, it's extremely easy. For the combination method outlined below, I just set it all up before going to bed and it's ready for the fridge when I get up in the morning. It can stay in the refrigerator for much of the day until I'm ready to strain it.

Homemade Yogurt (yields approx. 5 cups of Greek yogurt or 7+ cups of unstrained "regular" yogurt)

Ingredients:

  • 1/2 gallon milk of your choice (I use skim, but whole and 2% work equally as well, just make sure it's not "ultra pasteurized". Regular pasteurized is fine.)
  • 1/2 c. plain yogurt with live cultures (once you've made yogurt for the first time, you can use that for a starter in your next batch)-- you can also get live cultures from any store that sells cheese-making supplies.
Equipment:
  • Crock pot (anything larger than 2 quarts) with removable crock
  • Candy thermometer or probe thermometer with clip (or instant-read, if using only a crock pot)
  • Non-reactive sauce pan or pot larger than 2 quarts
  • Large, thick towel or blanket
  • Cheesecloth, butter muslin or clean tea towel (for Greek yogurt)
  • Large strainer (for Greek yogurt)
1) Turn crock pot on low to preheat
2) In a saucepan, heat milk to 185 F (if doing this in a crock pot, this can take a few hours on low), stirring occasionally to ensure the milk isn't burning on the bottom of the pan. What I love about using a probe thermometer, rather than a candy thermometer, is that I have an alarm when it's up to temperature, so I don't have to watch over it very closely.
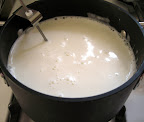
 
3) Cool until down to 110 F. You can speed the process by placing the pan in a cool water bath (I use the kitchen sink filled with cold water).
4) Once the milk cools down to 110 F, ladle a cup of milk into a non-reactive bowl (I use glass) with the 1/2 c. yogurt starter and whisk together. Above 110 F can kill the starter, under about 90 F and it won't set.
5) Pour the starter mixture back in with the milk
6) Pour milk into the preheated crock pot
7) Wrap the towel completely around the crock pot to insulate. Turn off the crock pot.
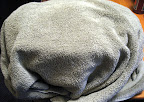
8) Let sit at room temperature for approx. 8 - 10 hours
9) Check consistency with a small, clean spoon. It should be slightly thickened, like soft custard.
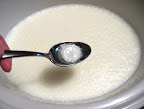
10) Don't stir it! Move the covered crock into the refrigerator to thicken completely, approx. 3+ hours. Be careful not to disturb it too much while moving so that the cultures can continue doing their thing. After refrigeration, you should notice some whey pooling on top. This is a sign of further thickening.
11) Store in a glass container, reserving 1/2 c. in a separate container to use as starter for your next batch.

Greek yogurt
To "greekify" your yogurt, you just need to strain it after step 10. Don't forget to set aside 1/2 c. yogurt in a separate container for your next batch. The starter does not need to be strained. A half cup of unstrained yogurt should contain enough active cultures to inoculate a half gallon of milk.
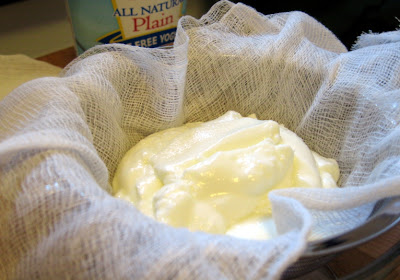
  • Ladle the finished yogurt into a strainer lined with fine cheesecloth, butter muslin or a clean tea towel and place over a deep bowl to catch the whey
  • Strain in the refrigerator for 2-3 hours until the texture is similar to thick sour cream
  • Enjoy!

Friday, June 29, 2012

DIY Greek Yogurt

If you've known me for more than a minute, you probably know I use yogurt like crazy. Specifically, plain Greek-style yogurt. I substitute it for sour cream and mayo, I use it in baking and often make a snack out of it, with a little fruit. I remember the days before it got trendy and you could pick it up pretty cheaply, if you could find it, just because it wasn't very popular. Now that it's become one of the "it" foods, it's nice that it's easily found (even more than one brand!), but the prices have climbed, especially if you find yourself living way too far from the nearest Trader Joe's.

I'll let you in on a little secret... it's the same stuff as the tub of plain ol' plain yogurt a few inches away at about 1/3 the cost. The difference is that it's strained, making it more concentrated and creamy (thus, higher in protein and other nutrients, by measure). It is very easy to do this at home. Yes, you will use a little volume due to the lower moisture content, but not 2/3.

For those of you who make your own yogurt, you can use this method to "Greekify" it, as well.

Tools: Strainer, cheesecloth, butter muslin or a clean tea towel (If using cheesecloth, you'll need to double up so that it's fine enough)
Ingredient: plain yogurt (I use nonfat, but use what you prefer)

Line the strainer with cheesecloth, add yogurt and place in a bowl to catch the extra whey.


Let strain in the refrigerator for 1-2 hours, or until it reaches desired consistency (if you strain it long enough, you actually get soft yogurt cheese, which is also tasty). It should be about the texture of thick sour cream.

That's it! See? Told you it was easy.

Sprouting Grains & Seeds

Before I moved to my tiny Manhattan studio, where kitchens are tiny and pests are probable, I used to sprout my grains on a pretty regular basis. It dawned on me the other day that we now live in a place where we actually have a space more conducive to sprouting again.

Why sprout? There are several nutritional benefits, including added vitamins and minerals. It also helps digest the foods more easily. When in comes to grains, many even find the taste more appealing than ungerminated whole grains. Sprouting rice, specifically, can be beneficial for fighting diabetes, cardiovascular disease and postpartum depression. More information can be found here.

 
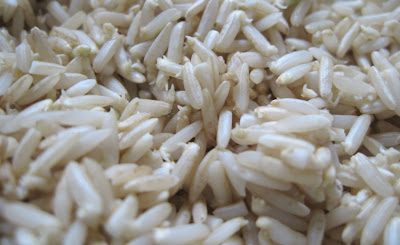
Sprouted brown rice: You should see small sprouts beginning to form, like tiny tails. This took approximately 48 hours.

The only real disadvantage is that you need to think ahead, though they keep well for a few days when refrigerated. Ever since school let out, I've been promising to make either andouille sausage for jambalaya or linguiƧa for paella. Since both involve rice, I figured it was easy enough to plan either way at this point, as I plan to make sausage over the weekend. (The wildcard will be whether or not I can find the file powder locally for the andouille.) I'm also planning on using quinoa soon, so started a batch of that, as well. Technically, it's a seed, but many of those sprout well, too.


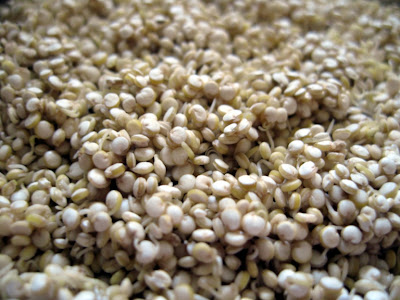
Sprouted Quinoa - You can see how the seeds have softened and released tiny little sprouts. I started in the afternoon and already had sprouts by the next morning, so they go quickly. 

Sprouting is easy. All you need are whole grains or seeds (rice or quinoa, in this instance) and a source of clean water. I use filtered because our tap water isn't great. I would recommend using water you're comfortable drinking. I should note that it's recommended you cook the sprouted foods, rather than further developing and eating raw, due to potential food-borne illness. You can use them just as you would the non-germinated products, though cooking times may be reduced.

Sprouted (Brown) Rice
  1. Rinse in strainer until water runs clear
  2. Pour into bowl and add 2-3 parts water to rice
  3. After approx 12 hours (or overnight), rinse again
  4. Once drained and rinsed, cover with a towel and place over a bowl to drain and begin to germinate at room temp (approx. 70 F), out of direct sunlight
  5. Rinse again after approx. 12 hours & repeat as necessary
Once you see small sprouts starting to peak out, like the picture above, you're done. This should take about 24-48 hours, depending on temperature and age/dryness of the grain. Refrigerate until use. The process is similar for other grains, though some may need low heat to start the process, especially in colder climates/seasons.

Sprouted Quinoa

Follow steps 1 & 2 above, but drain and rinse after about 3-4 hours. Rinse again in 8-12 hours and repeat as needed. These should sprout quickly, within 24 hours.

Monday, May 7, 2012

The Incredible Edible...

Four exams down, one more to go. I had a quick snack when I came home from this morning's exam, but it finally dawned on me that I needed to eat something of substance. I've been craving egg salad for a few days, so finally gave in (of course, in the most healthy way possible).

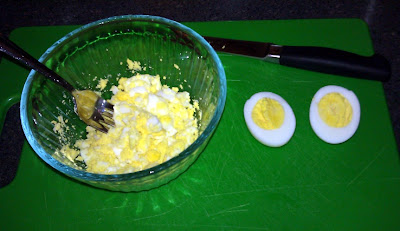
First, I had to hard boil the eggs. If you haven't hard boiled eggs, or if the yolks come out dry, crumbly or with a green sulfurous ring about them, there are better methods out there. If you love your eggs and make them perfectly, feel free to skip this one. I'll walk through the egg salad in the next entry.

Eggs, Part 1 (Hard Boiled: Easy and Foolproof):  


I should point out that just because "boiled" is in the name, this does not mean the eggs need to be boiled! If they are, they're likely going to come out poorly. Fear not! This method is pretty fail safe.

1. Place your eggs in a pot. Careful not to crowd them! They like a little elbow room. That doesn't mean, of course, that you need to place 4 eggs in a big dutch oven, just give them a little room between them so that they don't go crashing into each other and they can be surrounded by a bit of water.

2. Add enough cold water to cover them. You don't need to go much higher than that. Add a pinch of salt. Yes, salty water can raise the boiling temperature, but a pinch isn't going to do a thing other than give the eggs a little seasoning through its porous shell. (If you don't do salt, easy, don't add it.)

3. Cover and bring them to a boil. Don't stick it on "high" and walk away! Depending on the stove, I'd use medium to medium-high heat. Stay close by so that you can hear when the water is boiling.

4. As soon as it boils, turn it off! Leave the cover on to retain the heat. If you have an electric stove, move the pot to another (cool) burner or off the stove completely. If it's gas, you're pretty much done.

5. Start a timer for 15 minutes and walk away. When the timer is done, so are the eggs! (no need to run, an extra minute won't hurt)

6. Place in a bath of ice water to stop the residual cooking.

You will have perfectly creamy yolks and firmly set whites. Enjoy!

Note: If you have older eggs vs. super-fresh, use them. They're easier to peel.